A 60-Minute Workflow for Creating Polished Tutorial Videos
Video tutorial creation doesn’t have to be a complicated, time-consuming process. Imagine turning ideas into a polished lesson in just 60 minutes.
In this article, we’ll walk you through a clear workflow for video production that takes your content from script to finished guide effectively. Whether you’re an experienced editor or just starting out, these practical steps will help your tutorials look professional, captivate audience, and make sharing knowledge effortless.
What is a tutorial video?
This is an instructional video designed to teach viewers how to complete a task, acquire a skill, or understand a concept. It combines visual demonstrations with explanations, often including on-screen text or graphics to make studying clearer.
Key features are:
- Step-by-step guidance: Breaking a process into manageable actions.
- Pictorial demonstration: Showing techniques or procedures in real time.
- Explanatory narration or captions: Providing context, tips, or clarification.
- Practical focus: Helping watchers achieve a tangible outcome, such as mastering a tool or performing a task.
How to make a tutorial video: 60-minute workflow
Creating high-quality video instructions doesn’t require extensive production teams or days of effort.
Minute 0–10: Strategic Script Development
A precise blueprint is crucial for making video tutorial:
- Define Learning Objectives: Identify the knowledge or skills observers should acquire, whether comprehension, application, or mastery.
- Break Down Procedures: Divide complex processes into 3–7 actionable segments or trim your video script, each corresponding to a scene element on screen.
- Craft Natural Narration: Write in conversational phrasing. Avoid unnecessary technical terms unless your audience expects them, and include alternative wording for challenging steps.
- Visual Planning: Annotate areas for overlays, highlights, or zoom effects. Storyboarding platforms like Milanote, Notion, or Figma can chart the sequence.
- Allocation: Assign approximate duration to each portion to maintain a concise total runtime.

Pro Tip: A thoughtful outline reduces errors during recording and video editing, speeding up overall production.
Minute 10–20: Precision Camera Setup
A professional appearance depends on preparation and controlled environment. Points to help make a video tutorial:
- Audio Tape: Use high-quality dynamic or condenser microphones (e.g., Shure SM7B, Rode NT1-A) and monitor input levels to prevent distortion.
- Lighting Design: Employ three-point illumination or softbox arrangements for on-camera segments, ensuring even brightness without shadows.
- Screen Recording: Grab at native resolution (1080p or higher) with 30–60 frames per second.
- Workspace Control: Minimize background interference with acoustic treatments, and maintain a neutral backdrop.

Pro Tip: Conduct a short test clip to verify sound fidelity, lighting consistency, and sharpness before creating tutorial videos.
Minute 20–35: Efficient Capture Workflow
Shooting efficiently minimizes post-production. Hints for video guides:
- Segmented Sections: Film individual steps instead of a single continuous take, simplifying later adjustments.
- Focus: Highlight cursors, keystrokes, or sections of the interface to rule attention.
- In-Frame Annotations: Utilize drawing tools or real-time overlays to emphasize main points.
- Delivery & Timing: Speak slightly slower than normal conversation, enabling to follow video instructions and facilitating synchronization with graphics.

Pro Tip: Engaging, approachable commentary maintains viewer interest more effectively than overly rehearsed delivery.
Minute 35–50: Advanced Refinement
Editing transforms raw captures into seamless content. This is how to create tutorial videos:
- Track Separation: Keep narration, footage, and music on distinct layers for precise control.
- Audio Enhancement: Apply noise reduction, compression, and equalization to improve clarity.
- Workflow Shortcuts: Utilize keyboard commands, reusable templates, and auto-caption features for efficiency.
- Consistency Review: Ensure uniform style, transitions, and font usage throughout the project.
| Tutorial Video Maker | Platform | Functions |
|---|---|---|
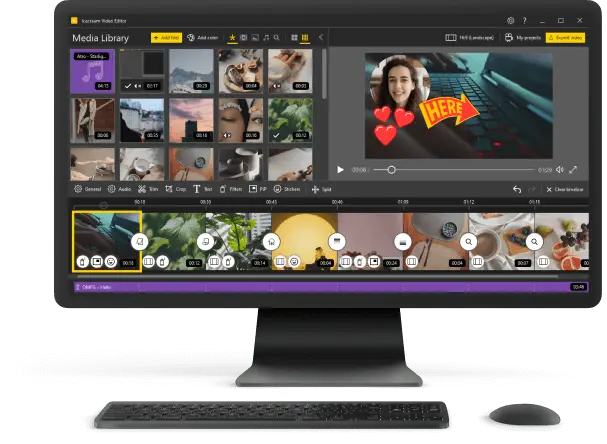
| Icecream Video Editor | Windows | Intuitive environment for beginners, drag-and-drop interface, smooth cuts, and synchronized sound. |
| DaVinci Resolve 20 | Windows/Mac/Linux | Advanced suite for color correction, channel refinement, and comprehensive media handling. |
| CapCut | Windows/Mac/iOS/Android | Flexible free service with keyframe motion, chroma effects, and creative filters. |
| Adobe Premiere Pro | Windows/Mac | Industry-leading software offering multi-layer composition, plugin support, and Adobe ecosystem integration. |
| CyberLink PowerDirector 2025 | Windows | All-in-one solution featuring motion tracking, customizable patterns, 4K export, and intuitive navigation. |
| Wondershare Filmora 14 | Windows/Mac | User-friendly workspace with extensive animations library, sleek crossfades, and simplified exporting. |
| Final Cut Pro 11 | Mac | Mac-exclusive utility with AI-assisted editing, magnetic timeline, and seamless Apple device connectivity. |
| Clipchamp | Web | Online-based tool with ready-made templates, stock media access, and fast browser production capabilities. |
| Shotcut | Windows/Mac/Linux | Open-source program supporting diverse formats, customizable filters, and flexible project management. |

Pro Tip: Clean, minimalistic retouchment enhances comprehension and gives a professional appearance.
Minute 50–60: Distribution Optimization
Finalizing content ensures maximum reach and accessibility. How to make a how-to video:
- Export Specifications: Save as MP4 with H.264 compression, balancing quality and file size for refined playback.
- Platform Customization: Adjust resolution, aspect ratio, or bitrate for YouTube, mobile devices, or e-learning portals.
- Metadata & Discovery: Include descriptive titles, keywords, timestamps, and tags to improve search visibility.
- Visual Branding: Create thumbnails with bold, legible text and consistent color schemes to increase engagement.
- Accessibility Features: Add captions to videos, transcripts, and image descriptions to broaden audience inclusivity.

Pro Tip: Schedule uploads strategically, track performance analytics, and adapt future projects based on engagement metrics.
Conclusion
Creating a polished tutorial video doesn’t need to take hours. By following a structured 60-minute workflow, you can produce content that educates and entertains effectively. Success comes from careful planning, efficient execution, and selecting the right tools for each stage.
With practice, video editing becomes effortless, allowing you to focus on delivering meaningful information rather than struggling with technical details.

Expert Tech Writer
