How to Change Photo Resolution on Different OSs
Image resolution affects not just the quality of an image, but also its size. Lower resolutions will result in blurry pictures, while higher resolutions can cause your file sizes to become too large.
Resolution refers to the size and quality of an image. The higher the resolution, the better quality your image will have.
When it comes to digital images, understanding how to change the resolution of photos is a crucial skill for anyone who works with them. It provides users with greater influence over their files and ensures that the photos stay impeccable no matter where they are used or printed

How we picked image resolution changers
To come up with the top 5 tools to adjust photo resolution, we evaluated image resizers and online platforms based on the following criteria:
- Ease of use;
- Device and OS compatibility;
- Availability of the free version;
- Price of Pro version/subscription, if applicable;
- Additional functionality.
Read on to find the best photo resizer for your needs, skills, budget, device type, and operating system.
Icecream Image Resizer (Windows)
Sometimes users may want to resize photos because they don’t fit a certain situation. For example, it’s impossible to email high quality images if they exceed certain size limitations. Also, some online resources only accept images of a certain size.
To give you full control, you need a program with functionality to change the photo's dimensions. One such software is Icecream Image Resizer.
How to change your photo's resolution with Icecream Image Resizer
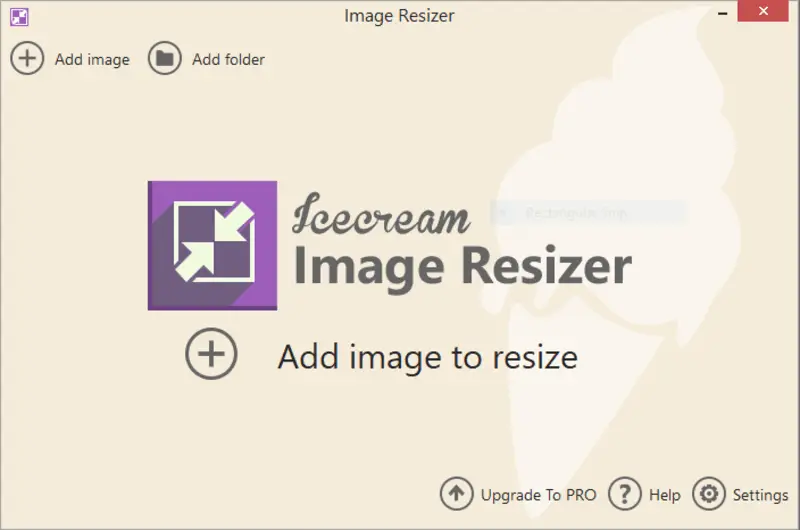
- Download free image resizer for Windows, complete the installation process, and launch the application.
- To add a file for resizing, click the "Add image to resize" button in the middle of the main window. You can also hit "Add folder" and import an entire set of photos located in one place.
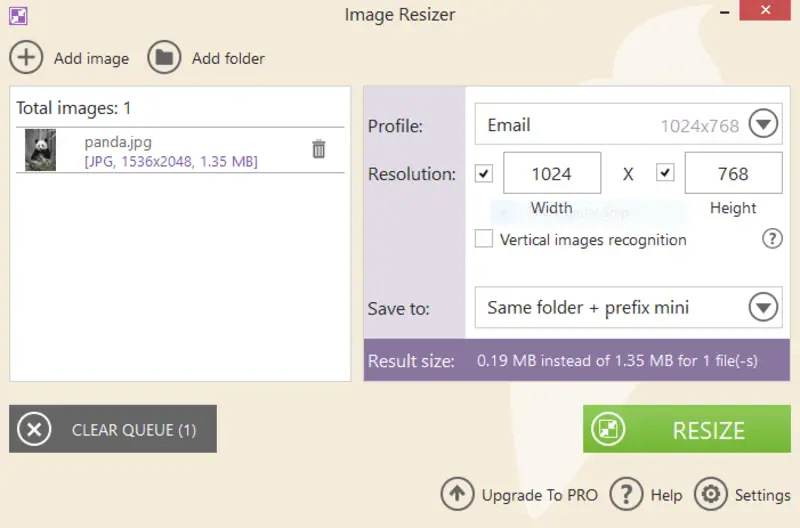
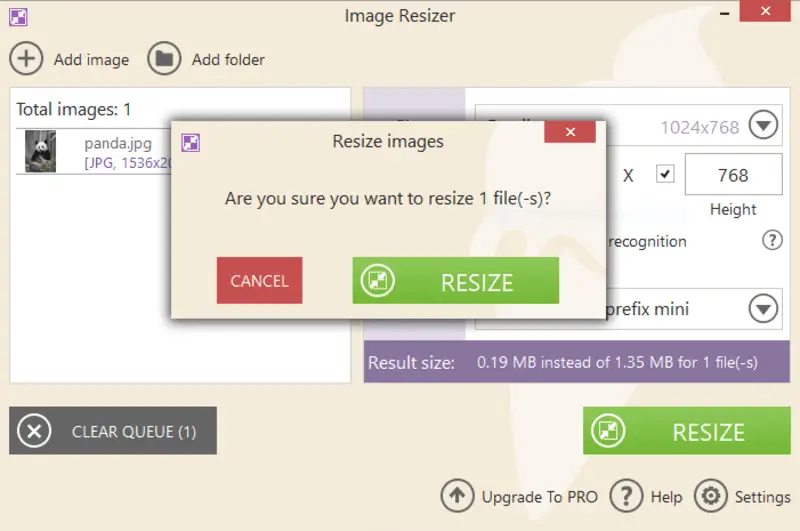
- Configure the photo resolution and other settings. You can choose one of the suggested options, or pick "Manual" and enter values.
- To initiate the processing, press the "Resize" button.
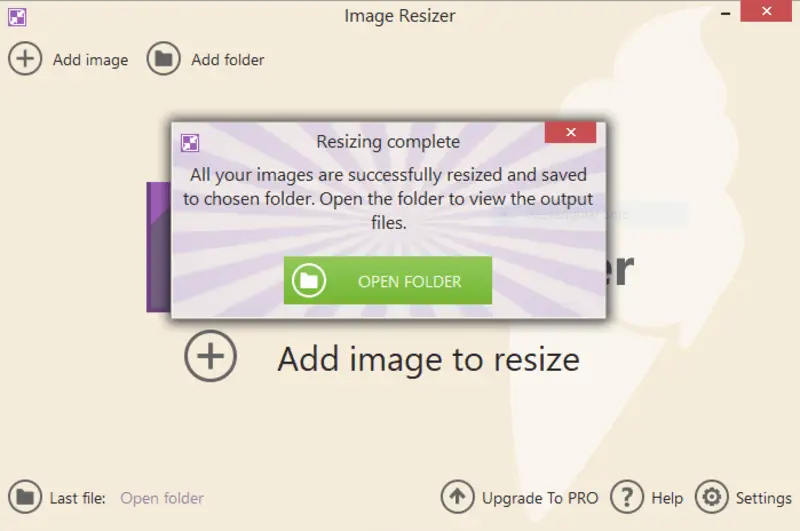
- Once resizing is finished, click "Open folder" to go to the destination of your new file.
Key features:
- Free specialized image resolution changer.
- Supports JPEG, JPN, PNG, BMP, and TIFF formats.
- Has the ability to change dimensions of images in bulk.
- Available size presets are email, Facebook, Instagram, and more.
- Allows add a personalized watermark to your images.
- Free image resizer works on Windows 11, 10, 8, 7, and even XP.
- Is suitable to be used by beginners and professionals.
Tips to change image resolution
Before you begin, consider the following tips to make your experience as smooth as possible.
- Check the photo's dimensions. Before altering the size of a photo, examine its current measurements and resolution.
- Select the right software. Use photo editing software that is suitable for the type of photo you are working with.
- Back up the original file. Before making changes, duplicate your image. This way, you will not overwrite your original file.
- Understand DPI. Familiarize yourself with the term DPI (dots per inch) and how it affects the sharpness of an image.
- Compress photos. Compressing photos can diminish their file size and decrease their resolution while still safeguarding their overall quality.
- Convert file types. Convert your photos from one format to another if you need to change their resolution or file size.
Preview (MacOS)
If you want to print a photo, you want to have have in its best resolution and size. On the other hand, if you're using an image for a website, you'll need to reduce the resolution to make sure the file size isn't too large.
Preview is an app designed to view and edit images on Apple devices. It comes pre-installed on all macOS devices, making it the perfect choice to quickly change your image resolution.
How to change photo dimensions on macOS in Preview
- First, open the image that you intend to modify in the app. Double-click the file if Preview is set as your default image viewer or right-click on it and hit "Open with...".
- Next, select "Tools" and choose the "Adjust Size" option found in the drop-down menu.
- A window will appear with several options for resizing the image. You can pick one of the pre-set dimension settings or enter specific "Width" and "Height" measurements.
- Once you're ready, click "OK" at the lower part of the window to apply the changes. The original photo will be altered.
Pros:
- Free and pre-installed image resizer for macOS.
- Pre-sets are available as well as the option to customize the resolution.
- Allows to make edits to the image, like adding shapes, text, lines, etc.
- Built-in PDF reader and editor.
Cons:
- The changes are made to the original file, so you need to make a copy if you wish to keep both versions.
Fotor (Online)
Although it's great to have a specific photo resolution changer for your device type and OS, sometimes you may need to use a cross-platform tool. Consider the option to change the dimensions of your image with an online platform.
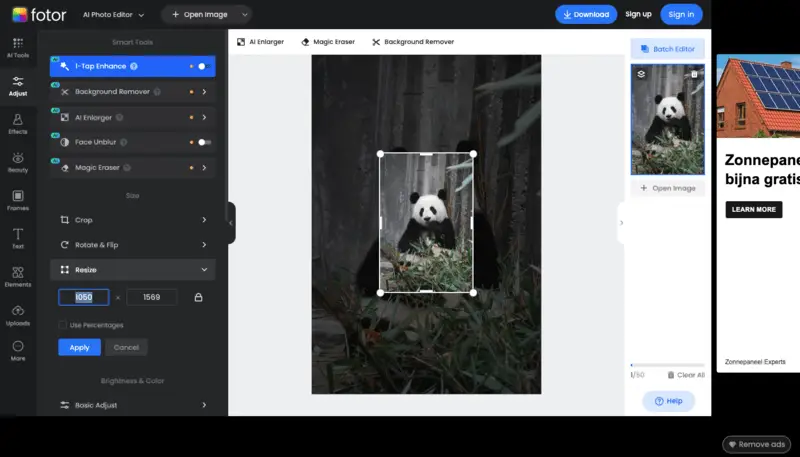
For example, take a look at Fotor. It is a web-based photo editor and image resizer that provides the means to adjust the resolution of any photograph as well as other useful features.
How to change photo resolution with Fotor
- Open the website and hover over "Photo Editing Tools" to open the drop-down menu. Select "Resize Image".
- In the new window, hit "Resize Your Image for Free".
- Click the "Open Image" button to upload the files or drag and drop them directly into the browser's tab.
- In the "Resize" field, enter the desired dimensions. Don't forget to hit the Lock icon, so the changes apply proportionally.
- Click "Apply" to save your changes.
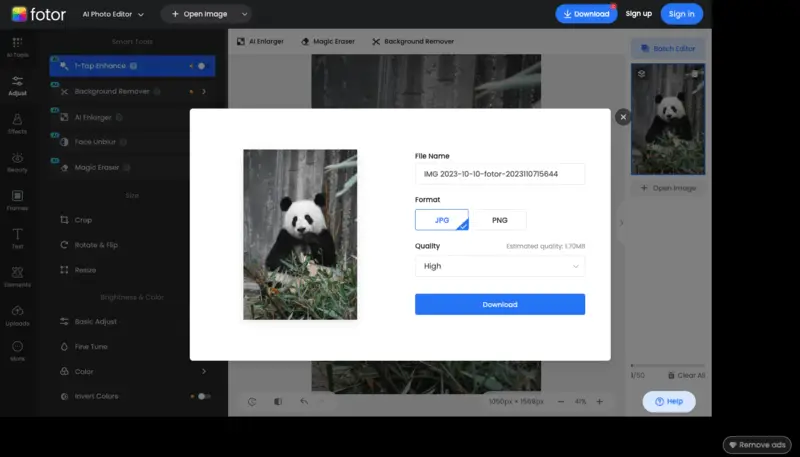
- Press the "Download" button, enter the file's name, choose the output format, and select the quality. Click "Download" again.
Pros:
- The ability to resize your photos to various resolutions, such as square, 4:3 ratio, and others.
- Many features in one place: make a collage, add text to the image, and more.
- Picture resizer has desktop versions for Windows and Mac, as well as mobile apps.
Cons:
- Presence of advertisements around the working area.
- Some tools are not available with free access.
- Overloaded interface with new AI tools that may confuse users at first.
Mobile apps
Sometimes you need to catch up with the work on the go and don't have your computer or laptop handy, or are not connected to the internet. In such a situation, you can always rely on your phone.
To change the image's resolution on your phone you won't even need a new program - you already have them pre-installed.
See below how to change the resolution of pictures on mobile devices - iPhone and Android-based phones.
Photos (iOS)
- Open the app and select the image you want to edit.
- Tap the "Edit" button at the top of the screen. Hit the "Crop" icon.
- In the top right corner, locate an icon with "Segmented screen". Change the dimensions to the desired size: pick a shape or choose one of the pre-set aspect ratios.
- When you're finished editing, tap "Done" again to save your edited photo and return to your library.

Gallery (Android)
- Open the photo you need to change the resolution with the program.
- Click the "Pencil" icon to bring up editing tools.
- Hit the "Three-dots" icon on the very right of the toolbar. Select the "Resize" option.
- Choose one of the provided photo resolution configurations and press "Done" to apply the changes.
That's it! You can now share your newly-edited photo with friends and family, or use it however you like! With just a few simple steps, you can easily change the resolution of a picture on your phone.
Although very basic, the capabilities of these widgets are sufficient to make simple edits when you're short on time and resources.

Choosing the right photo resolution
Selecting the appropriate resolution for a photo depends largely on its intended use. Below are some guidelines along with the impact of resolution on image clarity and file size.
Printing
For printing purposes, especially for large formats like posters or banners, you'll need a high-resolution image.
Higher resolution means more dots per inch (DPI), resulting in sharper and clearer images when printed. 300 DPI is the standard for clear prints.
Web sharing
For displaying images on websites or social media platforms, you don't need as high resolution as for printing.
Images with lower resolution may appear slightly less sharp, but the difference is usually not noticeable unless zoomed in. Generally, resolutions between 72 to 150 DPI are suitable for sharing online.
Plus, such pictures have smaller file sizes, making them quicker to load. This is important for website performance and user experience.
Photo resolutions for different use cases
| Use Case | Resolution (Width x Height) | Pixel Count | Description |
|---|---|---|---|
| Web Image | 800 x 600 | 480,000 pixels | Standard resolution for website images. |
| Social Media | 1080 x 1080 | 1,166,400 pixels | Square images for Instagram, Facebook, etc. |
| Facebook Cover Photo | 820 x 312 | 255,040 pixels | Cover photo for Facebook pages. |
| Instagram Post | 1080 x 1350 | 1,458,000 pixels | Portrait format for posts. |
| Twitter Header | 1500 x 500 | 750,000 pixels | Banner image for profiles. |
| Blog Post Image | 1200 x 675 | 810,000 pixels | Suitable for article feature images. |
| HD TV Display | 1920 x 1080 | 2,073,600 pixels | Full HD for TV screens. |
| 4K Display | 3840 x 2160 | 8,294,400 pixels | Ultra HD for large screens or TVs. |
| Printed Photo (4x6) | 1200 x 1800 | 2,160,000 pixels | Photo-quality prints. |
| Printed Photo (8x10) | 2400 x 3000 | 7,200,000 pixels | Large photo prints. |
| Poster | 6000 x 8000 | 48,000,000 pixels | High resolution for posters or billboards. |
| Professional Photography | 6000 x 4000 | 24,000,000 pixels | Professional photo prints. |
FAQ
- How do I adjust the pixel count of a photo?
- In many editors, you will be able to enter the specific values for the width and height of your picture, setting the exact number of pixels.
- Can I make a photo bigger while preserving its quality?
- You can try to use an image editor with AI features to increase the size of your photo. For example, some smart tools will generate additional background around the existing one to help you get a photo with a higher resolution.
- Will changing the image resolution result in reducing the size of the file?
- Yes. For instance, if you lower the resolution, the file size will become smaller.
- How do I resize an image without losing quality?
- Resizing an image while maintaining its quality requires using an advanced program, such as Adobe Photoshop or GIMP. You also have to be proficient in using the tool and its capabilities.
- Is there any way to enlarge a small photo without compromising its quality?
- Unfortunately, no - when enlarging a small photo, it is not possible to retain all of its original quality. As a result of the decrease in clarity when making it larger size-wise.
- What is DPI and how does it relate to photo resolution?
- DPI stands for "dots per inch" and is a measure used to describe the physical size of a printed photograph about its pixel dimensions (resolution). Generally speaking, higher DPI means better print quality and larger file sizes.
- What is the difference between DPI and PPI?
- DPI is related to the physical printing of an image, while PPI pertains to the display or resolution of a picture.
- What is resampling?
- It is the process of adding or removing pixels from an image to change its resolution.
Conclusion
In conclusion, learning how to change the photo's dimensions is fairly simple and can be completed without any professional help. In a short amount of time, you can reap the rewards of higher-resolution pictures without compromising quality or spending too much of your day.
By following the steps outlined in the article, you can easily and quickly change the resolution of your images on any device. So what are you waiting for? Get started now and take advantage of this guide to pick the best tool for you!



.webp)
.webp)
