Why Is My Snipping Tool Not Working?
The Snipping Tool app may seem simple, but it’s a really useful program to take screenshot on Windows. That said, it can be annoying when it doesn't work properly.
In this article, we’ll explore some common reasons why Snipping Tool may not be working and offer some practical solutions to get it back on track.
Whether you’re dealing with crashes, error messages, or problems getting your images (Snipping Tool won't save screenshots), the right fixes can help you get everything running smoothly again.
Snipping Tool not working on Windows 10 and 11: causes
| Reasons | Explanation |
|---|---|
| Corrupted system files. | If some system files linked to the Snipping Tool are damaged or missing, it can lead to problems with the app. |
| Software conflicts. | Sometimes, other programs on your computer can interfere with the app. This is often due to recent updates or new software installations that don’t play nice together. |
| Permissions issue. | Not having the right permissions to run or access the tool can also cause it to misbehave. |
| Outdated drivers. | If the drivers for your graphics card or other essential hardware are outdated or incompatible, that might be why the Snipping Tool won't open. |
| Virus or malware. | Malware or viruses on your computer can disrupt how other programs function. |
| Hardware issues | In rare instances, problems with your mouse or touchscreen can affect taking screenshots. |
| System updates. | Occasionally, updates to your operating system can inadvertently create issues with the Snipping Tool. |
Restart your computer
Sometimes, all you need is a quick restart. Turning your computer off and on can often clear up those annoying little glitches that mess with the Snipping Tool.
Check for updates
It’s a good idea to keep everything updated because this can fix bugs and improve how things work. Here’s how to check:
- Windows update. Head over to your settings, then find "Update & Security." Click on "Windows Update" and look for a button that says "Check for updates."
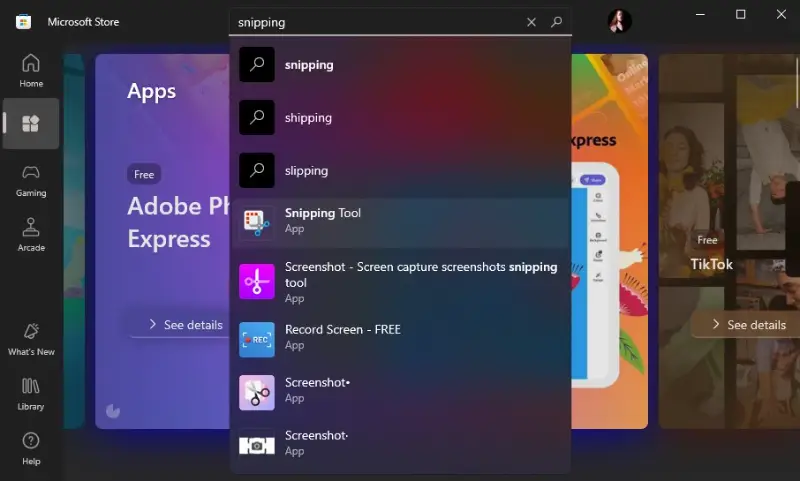
- Update Snipping Tool. Microsoft occasionally updates apps separately. Open the Microsoft Store and search for "Snipping Tool." If you see an update there, download it.
After you’ve updated everything, give your computer another restart. If the Snipping Tool is still acting up, it might be time to dig into some other troubleshooting options.
Run the troubleshooter
Troubleshooter is a built-in Windows utility designed to automatically detect and resolve various problems that may occur within the operating system or specific screenshot applications.
Here's how to access the troubleshooter:
- Press the Windows key + I to open the Settings app.
- Click "Update & Security" in the bottom part of the window.
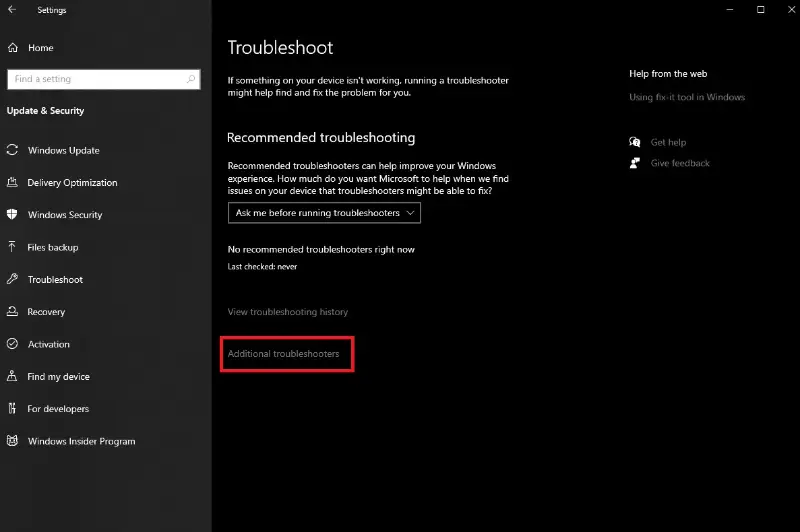
- In the left pane, select "Troubleshoot" and press "Additional troubleshooters".
- Scroll down until you find the "Windows Store Apps" option.
- Hit "Run the troubleshooter" and follow the instructions. The tool will scan your system for any issues related to the Snipping Tool and attempt to repair them automatically.
- After the utility completes the process, restart your PC to apply any fixes that were implemented.
If the troubleshooter doesn’t resolve the issue on the first try, run it again after reloading your device.

Reinstall Snipping Tool
Certain files necessary for the screenshot tool to function properly may become missing or damaged over time. Reinstalling the application ensures that all required files are present and in working condition.
How to reinstall the Snipping Tool:
- Open the Windows settings and select "Apps" from the menu.
- Scroll through the list to find the Snipping Tool. Click on it and select "Uninstall".
- To download the program, open the Microsoft Store and use the search bar to find it.
- Press the "Get" button to reinstall the screen capturing software.
Try resetting the Snipping Tool via Settings > Apps > Snipping Tool > Advanced options > Reset.

Try alternative screenshot software
Using a Snipping Tool alternative can indeed be a workaround if you're encountering persistent difficulties with the Snipping Tool.
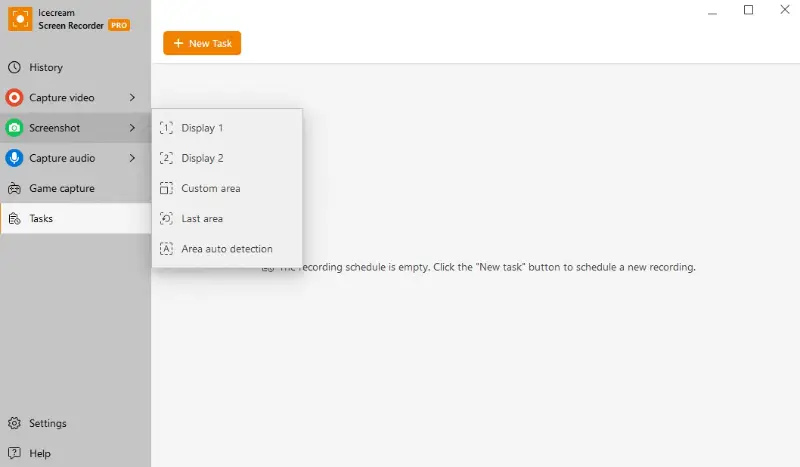
Icecream Screen Recorder offers comprehensive screenshot capabilities along with additional features like video recording.
How you can use it:
- Download free screen capture software from the official website.
- Follow the on-screen instructions to install it on your computer and launch the program.
- Choose the "Screenshot" mode from the side menu.
- Select the desired area of the desktop.
- Click the "Capture" button to take the screenshot.
The program provides basic image editing features to annotate and enhance your images.

Check for conflicts
Some third-party applications might conflict with the Snipping Tool. Try temporarily disabling or uninstalling recently downloaded software to see if it resolves the issue.
Security apps, including antivirus programs and firewall applications, can sometimes be the reason the Snipping Tool doesn't work. Temporarily disable or adjust the settings of your security program.
Use Event Viewer to check for any error messages or warnings. This can provide insights into underlying issues that may be causing conflicts.
Repair system files
Fixing system files can help resolve issues related to corrupted or missing data.
How to do it with System File Checker (SFC):
- Press the Windows key and type "cmd" in the search bar.
- Right-click "Command Prompt" and select "Run as administrator".
- Type the sfc /scannow command and press Enter to execute it.
- The SFC will scan your system for corrupted files and attempt to repair them automatically.
- After the process is done, restart your computer to apply the changes.
If the SFC cannot fix all issues, try running the Deployment Imaging Service and Management Tool.
Check for malware or viruses
Malware might modify or corrupt system files, block certain processes, or consume resources, which can cause the Snipping Tool app to malfunction.
- Employ built-in tools like Windows Security (Defender) to run a quick or full system scan.
- Consider using third-party antivirus software for an in-depth scan.
- Remove any detected threats and restart your system to see if the issue is resolved.
Regular virus checks ensure that critical components, like the registry or drivers, remain intact and aren't manipulated by harmful software.
FAQ
- Why does the screen go blank when I try to use the Snipping Tool?
- A black screen could result from display driver issues, high GPU usage, or interference from certain protections.
- Why does the Snipping Tool close automatically after opening?
- This can occur due to application errors, corrupted files, or system resource limitations.
- Why am I seeing a “missing component” error?
- It occurs when system files required by the Snipping Tool are corrupted, missing, or improperly configured.
Conclusion
Meeting the question "Why is my Snipping Tool not working" can be pretty frustrating. But don’t worry—just follow these steps, and you should be able to sort it out.
Doing this helps keep your Snipping Tool OK, so you can take and share screenshots quickly whenever you need to.


