How to Resize a JPEG Image
Understanding how to resize JPEG images is an important skill for anyone who works with digital content. JPEGs are the most common type of image used on the web and in print, so it's essential to be able to adjust their size when necessary.
JPEG (Joint Photographic Experts Group) is a common lossy compression technique used to compress digital images, particularly those created by digital photography.
Resizing any picture can be done easily and quickly if you are using the right tools and steps. In this article, we will review 6 best ways to resize JPEG images.
Image resizers: summary table
| Application | Batch processing | Aspect ratio adjustment | Quality loss | OS | Price | Our Rating |
|---|---|---|---|---|---|---|
| Icecream Image Resizer |
Yes
|
Yes
|
No
|
Windows
|
Free
|
|
| Preview |
Yes
|
Yes
|
Yes
|
macOS
|
Free
|
|
| Adobe Photoshop |
Yes
|
Yes
|
Yes
|
Windows
macOS
|
Free
|
|
| GIMP |
No
|
Yes
|
No
|
Windows
macOS
Linux
|
Free
|
|
| Microsoft Paint |
No
|
No
|
Yes
|
Windows
|
Free
|
|
| Photos |
No
|
No
|
Yes
|
Windows
|
Free
|

How we picked JPEG resizers
In order to identify the optimal program to change the size of JPEG images, we assessed several choices. We looked for easy-to-use picture resizers with features like batch processing, no quality loss and custom aspect ratios.
- We tested each image resizer with a sample JPEG image and resized it using the program's features.
- Then, we compared the original image to the new one to determine how much quality was lost during the process.
- We also tested how well each software managed large batches of photos.
Below is a list of the best JPEG resizers we have tested, along with instructions for use, and the overall score is summarized in the following table.
Icecream Image Resizer (Windows)
Resizing JPEG is not a problem, especially if you are using Icecream Image Resizer. Aside from JPEG, the application supports such formats as JPG, BMP, TIFF, and PNG.
How to resize JPEG images in Icecream Image Resizer
- Download image resizer for PC, install and open it..
- Add a JPEG image(s). Hit on "Add image to resize" button and import a JPG to resize. Alternatively, click on the "Add image" or "Add folder" buttons. Also, you can drag and drop them in the working area.
- Check the queue to make sure you’ve imported the right images. Press the recycle bin icon to the right of the file to delete it. Or hit the "Clear queue" button to delete all of them.
- Adjust the settings. Add more files if needed.
- Tap on a large green "Resize" button to change JPEG size.
- Wait until the software processes your files. Upon completion, the program will show you a report message that allows you to open the file(s) in a containing folder. Tap this button or just quit the application.
Note: The JPEG resizer only supports image formats (JPG, PNG, BMP, and TIFF). It won’t recognize files with inappropriate extensions.


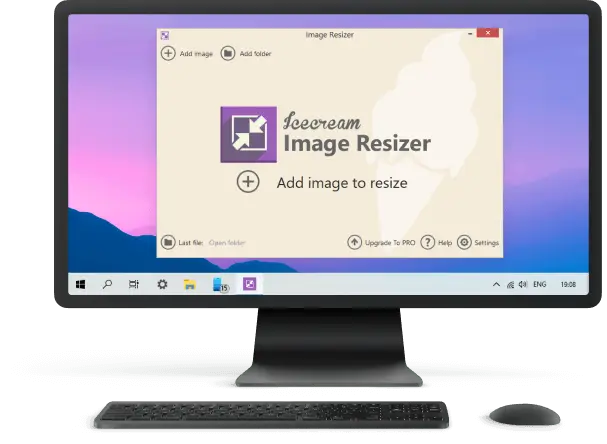
Image resizer's features:
- Batch processing. The "Add folder" option allows you to import an entire folder with multiple pictures.
- Profile specifications. There are presets for email, desktop, 320x200, HD 1080, and HD 720. The "Manual" option allows you to set the desired image resizing values.
- Resolution parameters. In the "Manual" mode, you are able to enter any image resolution values you want.
- Vertical image recognition. You may want to check the box if you are resizing vertical JPEG images.
- Output location options. "Same folder + mini" saves the resized image in the original location and adds the prefix to the file name. "Subfolder" creates a folder in the original one. "Choose folder" allows you to select any location using Explorer.
Preview (macOS)
Preview is a great tool for viewing, and editing images on Apple's operating system. It's user-friendly and free to download. This includes the ability to change the size of a JPEG.
How to adjust the dimensions of a JPEG image in Preview
- Open the image in Preview.
- Select the "Tools" and choose "Adjust Size".
- Enter your desired width or height into the appropriate field.
- Check the box next to "Scale Proportionally" if you need to maintain the aspect ratio of the image.
- Click "OK" when you're done.

Pros:
- Since it's pre-installed on Mac, you don't need to download or buy any additional software.
- Other picture editing tools are available: you can rotate, crop, add text to images, and more.
Cons:
- The adjustments you can make to an image are fairly basic compared to more advanced photo editing software.
- When altering the size of images, there may be some loss of quality due to compression.
- You must resize each image individually as there is no way to process multiple images at once.
Adobe Photoshop (Windows, macOS)
Resizing JPG files in Photoshop can be an excellent method to cut down the file size for faster web loading or to save space on your hard drive. With the right resizing settings, you can achieve significant file size reductions with minimal loss in quality.
How to change JPEG size using Adobe Photoshop
- Open your image in Adobe Photoshop.
- On the top menu bar, select "Image" and then "Image Size".
- Change JPEG resolution by typing the dimensions.
- Check "Resample" if needed.
- Click "OK" to save your resized image.


Pros:
- You can customize the image compression level applied before resizing.
- Increased regulation of sharpening, which can help optimize the image for web and choose proper resizing parameters viewing.
Cons:
- It's possible to introduce visible artifacts into the image.
- Increasing levels of amplifying compression can cause a decrease in color accuracy.
GIMP (Windows, macOS, Linux)
GIMP (GNU Image Manipulation Program) is a free and open-source raster graphics editor used for tasks such as photo retouching, editing, and composition. The program can be used for a variety of design tasks, including resizing JPEG pictures.
How to change JPEG resolution using GIMP
- Download the photo editor from the official website. Run the installation file and launch the app.
- Go to the "Open" menu and select the JPEG you want to customize.
- Now, locate "Image" tab and pick "Scale Image".
- A dialog box will appear where you can set the new width and height for the picture. You can choose the units (pixels, inches, etc.) from the drop-down menu. Enter the desired dimensions.
- Make sure the chain link icon next to the width and height fields is connected if you want to maintain the aspect ratio.
- In the "Quality" section of the dialog, you can choose the interpolation method. "Cubic" and "Sinc (Lanczos3)" are good choices for high-quality resizing.
- Click the "Scale" button to resize the image. Save the modified picture with the "Export As" option in the "File" menu.


Pros:
- Available for multiple operating systems.
- Besides JPEG resizing, offers a wide range of image editing tools, making it a powerful all-in-one solution.
Cons:
- The interface can be complex for beginners, requiring time to learn.
- Can be slower compared to some other programs, especially when handling large files or multiple layers.
- Limited support for CMYK color space, which can be a drawback for professional print work.
Microsoft Paint (Windows)
Resizing a JPG image is something that is regularly done by those who handle digital files. Fortunately, it is a simple task to accomplish with the help of Microsoft Paint.
How to quickly resize a JPEG image in Microsoft Paint
- Open your JPEG image in Microsoft Paint.
- Click the "Resize" button in the Home tab.
- Pick either "Pixels" or "Percentage" as the resizing JPEG type.
- Enter your needed width and height numbers.
- Check the box marked "Maintain Aspect Ratio" if you wish to retain the proportion of your image the same as it was originally.
- Hit "OK" to apply the changes and resize your picture.
- Go to the File tab, and tap "Save As".


Pros:
- Image size changer is easy to use and doesn't require any advanced knowledge of photo editing.
- Resizing is fast, so you won't be waiting around for long.
- The resizing process is non-destructive, meaning your original image isn't changed.
Cons:
- You cannot edit in finer detail than the basic options provided.
- You can only resize images with the same aspect ratio (proportions) as the original.
- Quality loss may occur when resizing if you are enlarging a photo significantly.
Photos (Windows)
The default Photos app offers a simple and quick way to resize images without needing additional software. This is useful for reducing file size for easier sharing or saving space.
How to resize a JPEG using Windows Photos
- Open your picture (right-click the preview and select Open with > Photos).
- Click the three-dot menu in the top-right corner.
- Select "Resize" from the dropdown menu.
- Define custom dimensions to enter specific width and height values.
- Click "Save" to create a new file with the resized image.

Pros:
- Built-in app, no need to install extra software.
- Saves the result as a new picture, preserving the original.
Cons:
- No preview of the photo quality.
Why resize a JPEG
Have you ever tried to attach a picture to an email only to find out it's too big? Or have you been trying to upload an image to a website and the file size was just too large? That's why you need to change the size of the JPEG image.
- By resizing a JPEG, you can decrease its file size with minimal deterioration of quality. This means you can easily attach it to emails, and upload it to websites. Or share it with friends without having to worry about its size. It helps keep your computer organized by reducing the amount of storage needed for images.
- Image resizing is also important for viewing images on different devices. If an image is oversized, it won't fit on most screens and will stretch out the photo. By resizing it, you can make sure that the photo looks good no matter what device or screen size you're using.
- Finally, resizing JPG files is essential for web design and printing projects. If your image is too large, it can slow down web page loading times and cause problems with printing. By resizing the image, you can ensure that your website runs smoothly and that your printed images turn out great.
So next time you need to send or share a photo, remember to resize it first! You'll save time, and storage space, and make sure your images look their best no matter where they're viewed.
How to resize a JPEG with minimal quality loss
JPEG resizing without lowering quality can be a tricky task. But with the right tools and techniques, it's not impossible. Here's what you need to know:
- Choose the right program. A good JPEG resizer can help you alter a JPG without diminishing its quality.
- Set the right size and resolution. Make sure your image is set to the correct numbers. It is advisable to apply the same resolution as the original image so the resized version looks just as sharp.
- Utilize the right file format. It is essential to save your resized JPEG in a different format such as TIFF or PNG. These formats retain more detail than JPEGs, making them ideal for resizing.
- Adjust other settings if needed. Some image resizers allow you to adjust things like brightness, contrast, color depth, and sharpness after JPG resize. Experiment with these settings until you get the look you want in your resized image.
With these tips in mind, you should be capable of resizing any JPEG without sacrificing quality!
Popular JPEG sizes for web
| Resolution | Dimensions (Width x Height) | Common Use Case |
|---|---|---|
| 72 DPI | Varies | General web images; historical standard for screens. |
| Full-HD | 1920 x 1080 pixels | High-quality photos for large displays, background images. |
| HD | 1280 x 720 pixels | Smaller web images, blog or social media posts. |
| Square | 1080 x 1080 pixels | Social posts (e.g., Instagram), square images. |
| Medium | 800 x 600 pixels | Small web images, thumbnails, or gallery pictures. |
| Resolution | 1080 x 1920 or 750 x 1334 | Mobile-responsive images for smaller screens. |
| Retina Display | 2048 x 2048 or 2x/3x of standard resolution | High-density screens (e.g., Apple devices) for sharp pictures. |
FAQ
- Can I resize multiple pictures at once?
- Yes, bulk image resizers enable you to batch-resize several JPEG files simultaneously. This makes it easier and faster to resize large numbers of images in one go.
- Can I resize a JPEG image without losing quality?
- It's challenging to resize a JPEG without any loss in clarity, but you can minimize it by using high-quality photo resizing tool and avoiding excessive enlargements.
- Is changing the pixel size of JPG lossy or lossless?
- It is usually lossy; this means that some of the information from the initial picture is forfeited during the compression process, resulting in inferior quality.
- How can I maintain the aspect ratio while resizing a JPEG image?
- To maintain the aspect ratio, ensure that the option to constrain or lock it is enabled in your photo editing software. This prevents disproportionate stretching or compression of the image during resizing.
- What resolution should I employ?
- Resolution depends on how you use your images. If you intend to post them online, 72-96 dpi is generally sufficient; if they are being used for printing purposes then 300 dpi is recommended.
- How do I know how much to change the JPEG size?
- It depends on what you're using the image for. If you're posting it online, you'll want to keep it small enough that it doesn't take too long to load. It varies by platform; for example, Facebook recommends images be 1200 x 630 pixels for best results. You'll need higher-resolution images with larger pixels to print them.
- What is the difference between DPI and pixel dimensions when resizing a JPEG for printing?
- [DPI][2](https://en.wikipedia.org/wiki/Dots_per_inch) (dots per inch) refers to the print resolution, while pixel dimensions determine the image size on a screen. When resizing for printing, adjust both the DPI and pixel dimensions accordingly to achieve the desired print quality.
- Are there any common mistakes to avoid when resizing a JPEG image?
- Common mistakes include enlarging an image beyond its size, which may result in pixelation, and neglecting to keep a backup of the original file before resizing. Also, avoid using low-quality resizing tools that can compromise image integrity.
Tips
- Choose the desired size. When resizing JPEG, you can select to make it smaller or larger. If you are printing the image, pick a size that is appropriate for the paper dimensions you are using.
- Crop the image. If you want to change the size of an image without losing any of the detail, you can crop it instead of reducing its dimensions. This will remove any unnecessary background or space that may be present in the original photo.
- Adjust the resolution. The resolution of a JPEG image refers to its physical dimensions and also affects its quality. Change JPEG resolution accordingly to maintain its clarity and sharpness when printed or viewed on a screen.
- Use editing tools. Make use of editing instruments available in your chosen image resizer to adjust brightness, contrast, hue, saturation, and other settings before saving your changes and exporting your final resized JPEG.
- Save as a different file type. If you need to save disk space by diminishing the dimensions of your JPEG image without compromising on quality, you can convert it to another format such as PNG or GIF instead.
- Compress the image. Compressing an image can help decrease its size while sustaining its original quality and resolution when sharing it online or via email attachments.
- Batch processing. If you have multiple photos that need resizing, choose a bulk image resizer that supports batch processing so that you can rapidly scale all pictures efficiently.
Common issues when resizing JPEGs
| Issue | Solution |
|---|---|
| Quality Loss | Use high-quality tools and avoid excessive resizing. |
| Pixelation | Limit enlargement; utilize software with advanced interpolation. |
| File Size Increase | Compress after processing or set lower resolution. |
| Distortion | Lock the aspect ratio during resizing. |
| Color Shifts | Opt for programs that manage profiles. |
| Loss of Metadata | Choose tools that preserve EXIF data. |
| Artifacts | Apply moderate compression or use lossless options. |
Bottom Line
Resizing JPEG files is a straightforward endeavor that can be completed quickly with the assistance of a few tools.
Adhering to these guidelines will provide you with the ability to change JPEG image size with minimal effort. With this guide, you should now have a better understanding of how to resize JPEGs and be confident in your ability to do so.

Editor-in-Chief at Icecream Apps
Co-authors

Tech Writer and Photography Aficionado
