How to Take a Screenshot on a PC
Knowing how to take a screenshot on a PC is an incredibly helpful skill. It can be used for capturing game moments, taking snapshots of your desktop, or even just quickly grabbing important information off the web.
Capturing screencasts on a PC can help you share information quickly, document issues, and even provide visual proof of something. In this article, we will show you several ways to take a picture of the screen. Read on to learn more about the process.
How we picked tools to take a screenshot

To ensure the accuracy of our instructions on how to take a screenshot on a computer, we conducted several tests using different operating systems.
We tried several methods, including using the desktop software and hotkey approaches.
Throughout our testing process, we paid close attention to the ease of use, speed, and quality of the screenshots captured.
Whether you're running Windows 11 or its earlier versions, there are multiple options to take a screenshot of whatever is going on the display. We'll go over 8 approaches, so you can select the method that works best for you.
Icecream Screen Recorder
Icecream Screen Recorder is a versatile software designed for capturing activities on your computer. It offers a user-friendly interface and a range of features suitable for creating tutorials, recording gameplay, or video calls and webinars.
How to screenshot on Windows with Icecream Screen Recorder
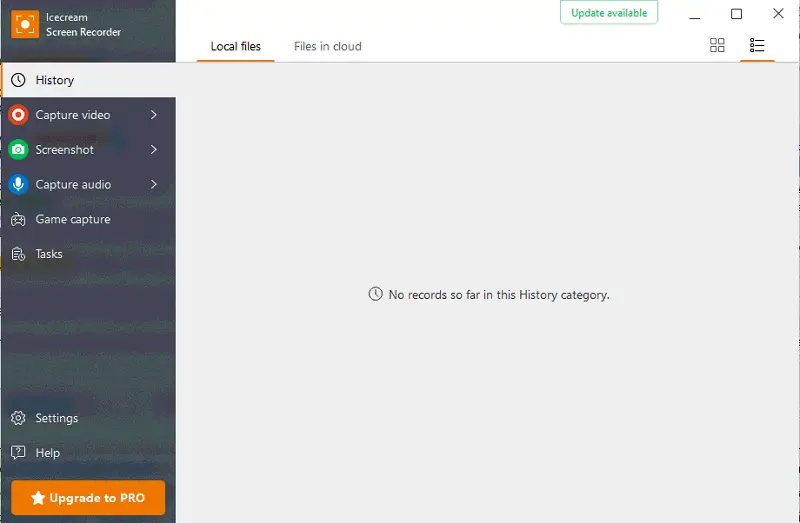
- Download free screen recorder for PC. Then, run the file and install the program as suggested by the Installation Wizard.
- Check the settings. The "Settings" button will bring you to the panel where you can tweak some configurations for your screenshots.
- First, open the "System" tab and select the output image format of the screenshots (PNG or JPG) in "Screenshot format".
- Turn on or off the zoomer that is useful for the most accurate selection of the frames of the screenshot area. Find it in "Area selection zoomer".
- In the "Hotkeys" tab you can change the shortcut combinations for easier working experience.
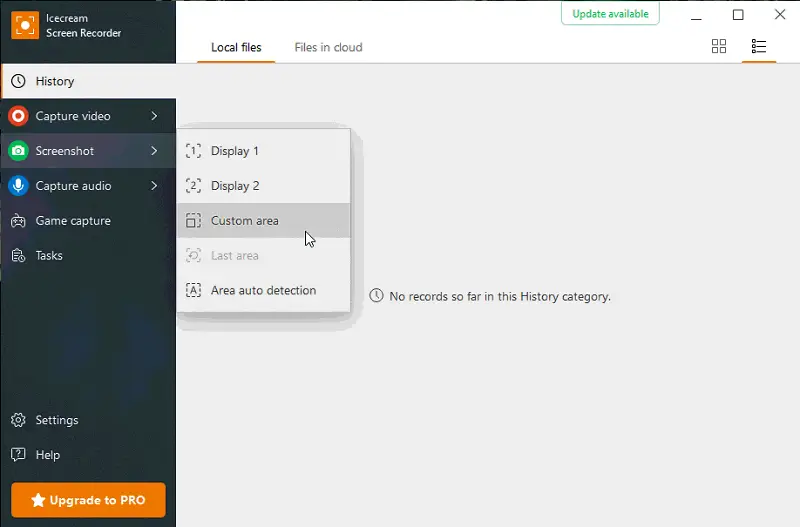
- Click the "Screenshot" button to choose the area of your capture.
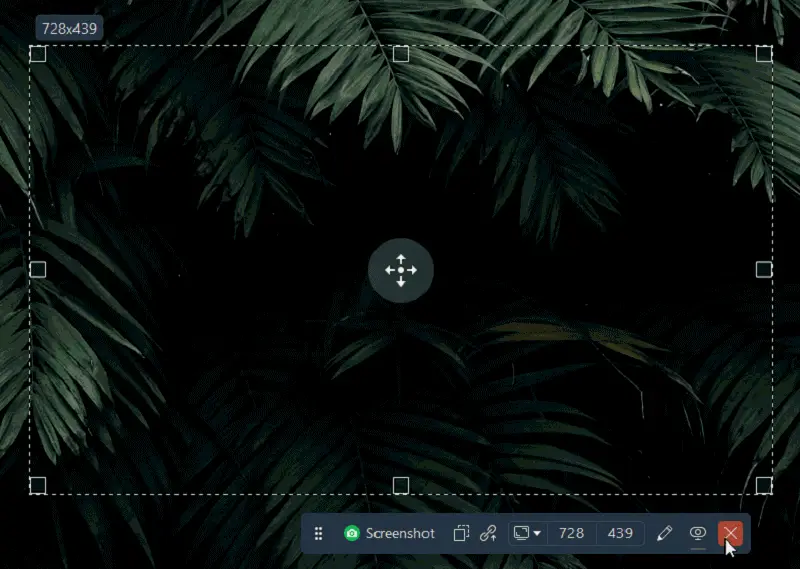
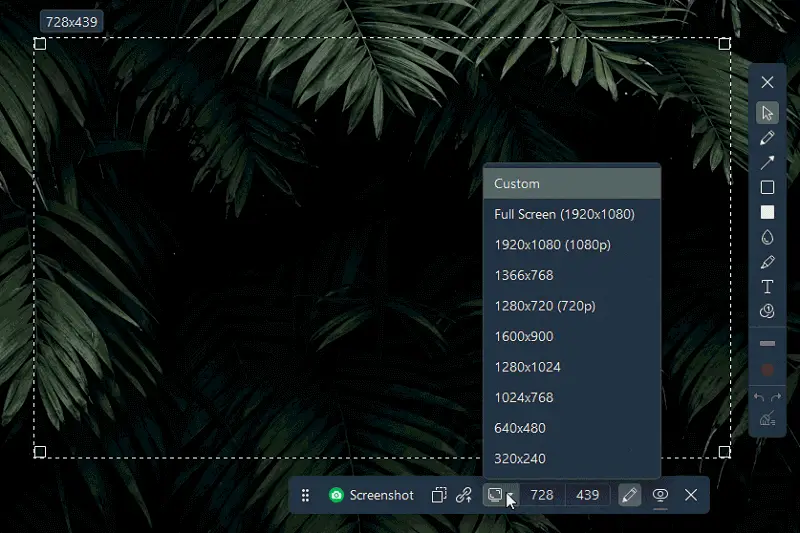
- Select the screenshot area by toggling the cursor over the desired section of your screen. Once the region is chosen, simply release the mouse. You can choose the parameters like custom, full screen, 960p, 720p, 1024x768p, 640x480p, 320x240p, and 160x120p.
- You can customize the area at any time before the picture of the screen is taken.
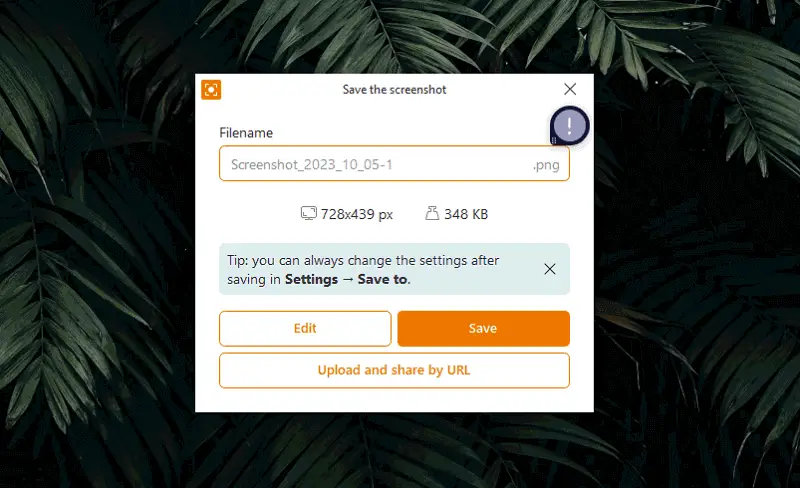
- Select one of three ways of saving the desktop screenshot:
- Screenshot. To save it as a PNG or JPG image, click the "Screenshot" button in the upper left corner of the task panel.
- Copy. By clicking the button, you let the program place your picture on the clipboard. After doing so, you can press CTRL+V to paste the screenshot wherever you want.
- URL. This button helps you turn the screen capture into a link that you can copy and share later.
What’s so special about this program and why choose it instead of taking screenshots in a standard way – by pressing the Print Screen button on your keyboard?
The point is Icecream Screen Recorder offers a number of unique options that make taking, trimming, editing, and sharing snapshots as easy as one can imagine.
Benefits:
- Drawing on screenshots. You can use the drawing panel to mark something on your desktop or make it more vivid. To access this panel, click the "Draw" button. Here, you can pick instruments like oval, rectangle, step, and arrow. You can select one of 3 contour thickness options and choose the color.
- Writing while screenshotting. It’s possible to add some text to your screenshot on PC as well. Click the corresponding button presented as the "T" icon. Then select the desired font size (from 8 to 34) and color. Single-click on the area where you want to insert your text.
- Undo option. To cancel the last changes, use the "Undo" button. The "Clear all" button located next to the "Undo" one will help you remove all the drawings and text from the desktop screenshot at once.
- Screen recording. This application allows its users to not only take picture of the screen, but also record the meeting in Zoom or elsewhere, game or presentation to share with your colleagues.
- Scheduling feature. Set timers to start and stop screen recordings automatically, perfect for unattended sessions.
Print Screen Button
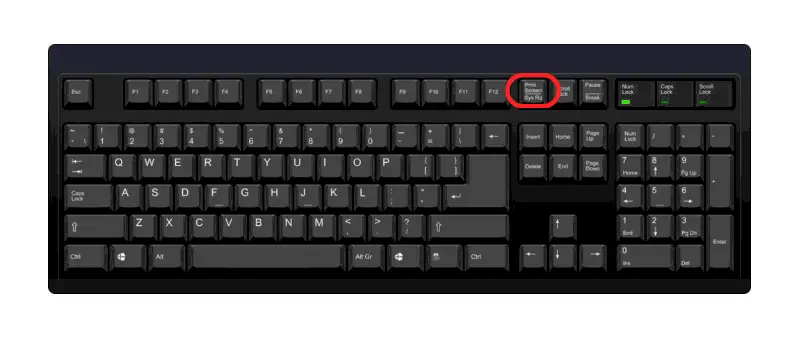
PrtScn is one of the most widely used techniques for capturing a PC display. It's usually located at the top right corner of the keyboard, near the function keys.
Some keyboards have an extra Fn (Function) key that needs to be pressed in combination with the Print Screen key for it to work properly.
How to screenshot on computer with PrtScn button
- To take a screenshot using Print Screen, press and hold down the "FN" key.
- Then press the "Print Screen" (PrtScn) button. This will capture the entire screen and save it to your clipboard.
- In order to store the image file on your computer, open up an editor such as Paint or Photoshop.
- Paste the file from your clipboard. Once you have done that, you can go ahead and convert it into an image file.
Pros:
- No extra software or subscription service is required for screenshotting.
- Most keyboards come with this key, so you don't have to worry about compatibility issues.
- Works reliably across all Windows versions without setup.
Cons:
- Only takes one screen capture at a time. If you need multiple screenshots, you'll have to take and save them one by one.
- You must paste the picture into a third-party program to save it.
- If you take the next screenshot without saving the previous one, you will lose the first image.
- Unless you organize them manually, images taken with the print screen button can become unorganized quickly.
The Windows key + Print Screen
Taking a screenshot on your Windows PC is easy.
How to do a screen grab on PC with Windows key and PrtScn
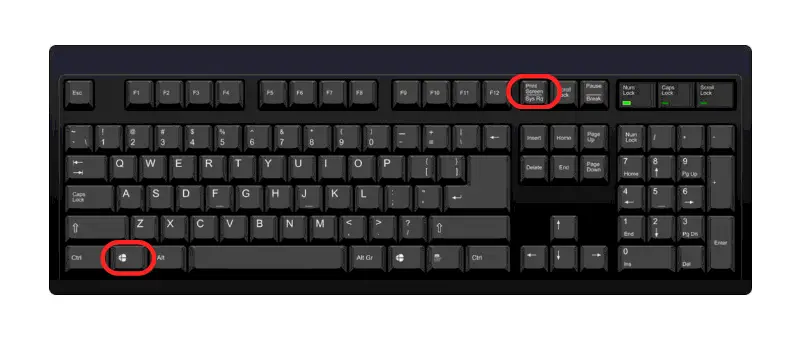
- Press the "Windows key" and "Print Screen" at the same time. The Windows key is usually located near the bottom of your keyboard, next to the Alt and Ctrl keys.
- When you have pressed the two keys, your screen will dim momentarily. This indicates that the desktop screenshot has been taken.
- Find it in your Pictures folder in a Screenshots subfolder.
Pros:
- Your screen captures are automatically stored in a folder in your Pictures library.
- The files are named according to the date they were taken, making it simpler to sort through them.
Cons:
- You can only take full-screen screenshots with this approach.
Alt + Print Screen
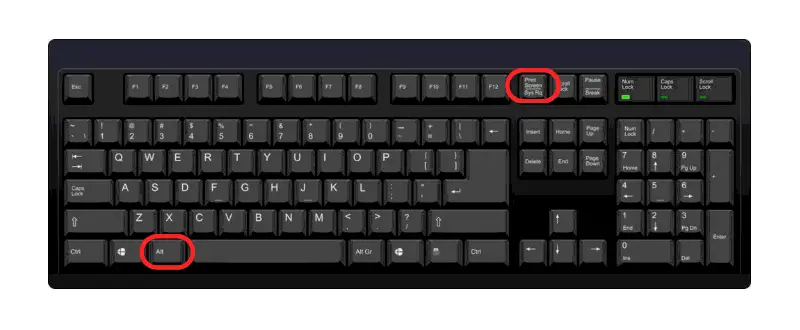
The "Alt + Print Screen" method is ideal for capturing a screenshot of active windows or dialog boxes. Since it only takes a screencast of the window that currently has focus. Here's how to screenshot:
How to take picture on PC with ALT and PrtScn
- Press the "Alt" and "Print Screen" keys all together.
- The PC screenshot will be taken and stored in your computer's clipboard.
- Launch a photo editing application, such as Microsoft Paint or Photoshop.
- Paste the image into the program by pressing "Ctrl" and "V" simultaneously.
- Save the file as an image, like PNG or JPG, for sharing or printing.
Pros:
- Capturing screenshot on PC of active windows without taking the inactive ones.
- Helps reduce the need to crop images afterward.
Cons:
- You can't capture the entire screen or multiple windows at once.
- Saving the image requires pasting it into a third-party application.
- Captured pictures may be low-quality due to compression issues, depending upon your system settings.
The Snipping Tool
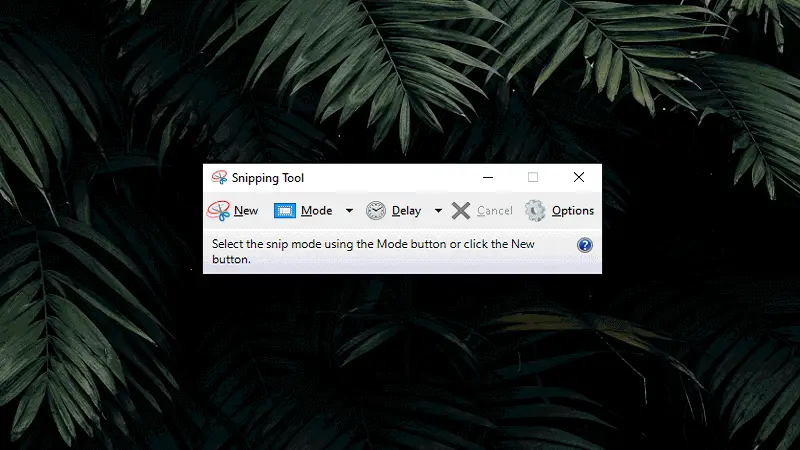
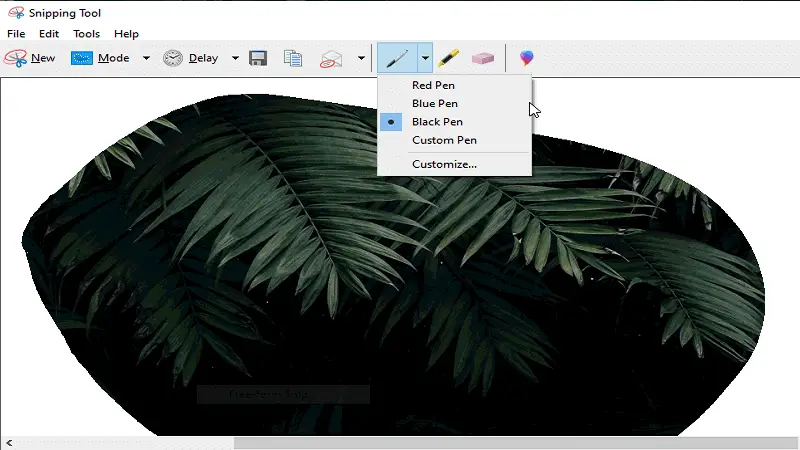
Taking advantage of the Snipping tool is a superb way to take a screenshot on a PC. It can be used on all Windows OSs, but Windows 11 offers an upgraded version of the screen recorder, which has lots of added features. It's a breeze to utilize and assists you in obtaining precisely what you require.
How to take a screenshot on a computer with Snipping Tool
- Hit the Start button, enter "Snipping Tool", and choose it. You can also press "Win+Shift+S".
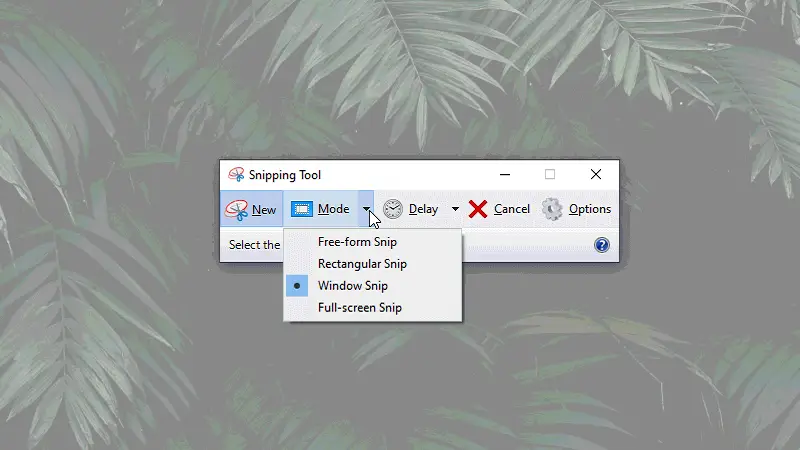
- After the program opens, specify the type of snip you want to build: rectangular, free-form, window, or full-screen.
- When you have picked the type, click "New", and your screen will pause and display a white overlay. Move your mouse to create the shape of your snip, and when you are ready to release, a picture of the screen will be taken.
- The tool will pop up with your screenshot inside. Now you can draw lines, highlights, or insert text to your screenshot before saving it.
- Click the "Save" button and choose where you want it saved.
Pros:
- Choose whether or not to include the cursor in your desktop screenshot.
- Screenshots can be edited right away.
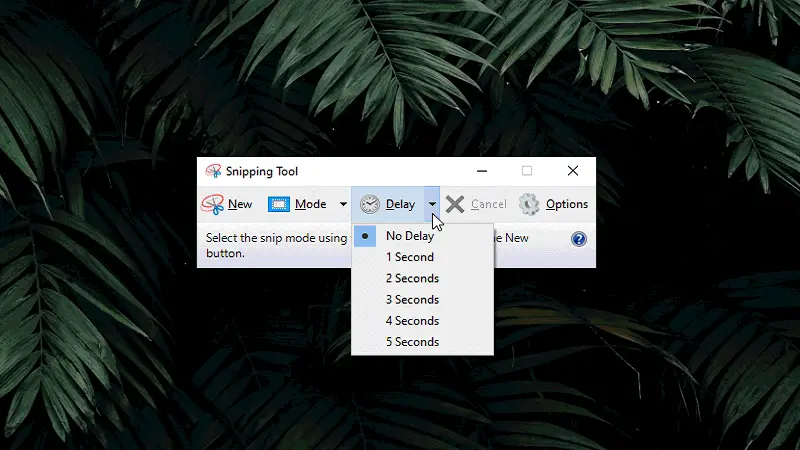
- It allows you to delay the cast by up to 5 seconds.
- Supports multiple snip modes: free-form, rectangular, window, and full-screen.
Cons:
- It can only grab what's visible on the screen. You can not open any folders while screen recording.
- It doesn't allow for snipping entire web pages or documents.
- Users can't capture the screen with a single click.
Xbox Game Bar
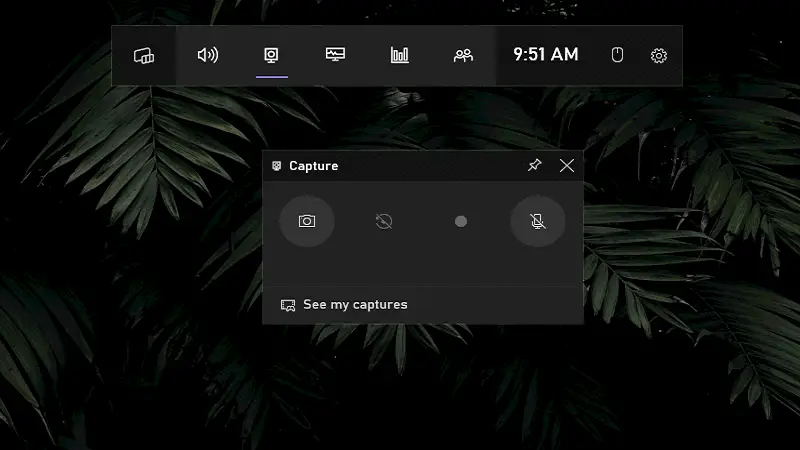
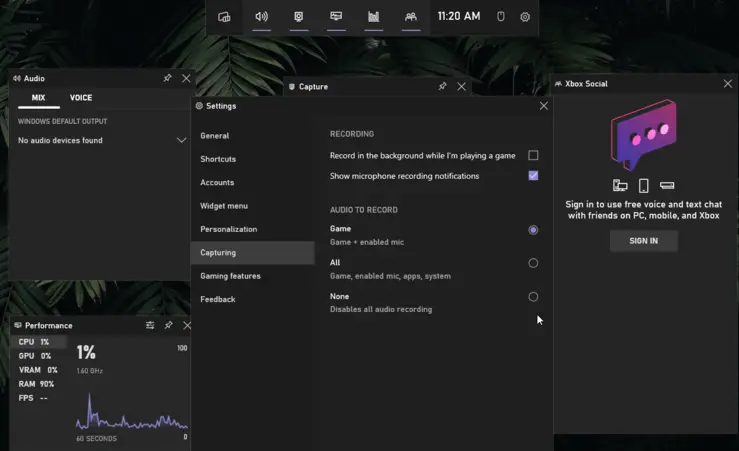
The Game Bar serves as an awesome tool for taking a screenshot on your PC. It's integrated into the Windows 10/11 operating system and it's simple to operate.
How to take a snapshot on Windows with Xbox Game Bar
- Press the "Windows key + G". This will bring up the Bar.
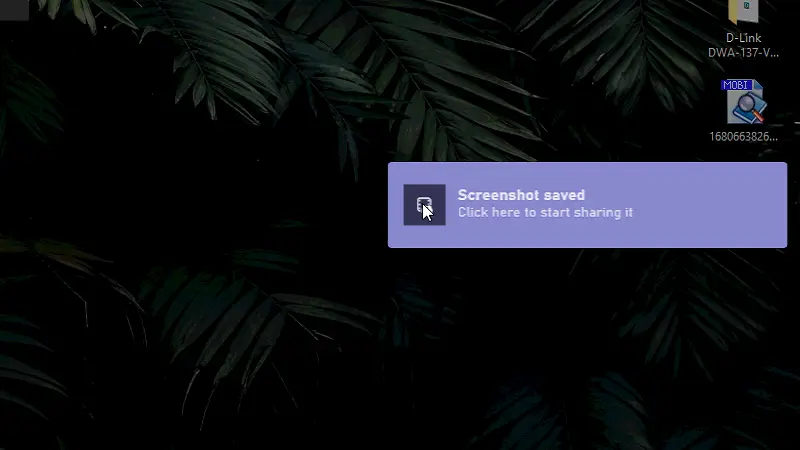
- Once you have the Game Bar open, click the camera icon to take a screenshot. Or press "Windows Key + Alt + PrtScn" to automatically make a PC screenshot.
Pros:
- Free to use and you don't need any special software or hardware.
- Offers quick access with customizable keyboard shortcuts.
Cons:
- Doesn't have as many features as other screen recorders, such as Snipping Tool.
- Only captures games and apps that are designed for Windows 10.
Greenshot
Greenshot is a free, lightweight, and powerful screenshot tool for Windows that offers various modes and editing features.
How to take a screenshot with Greenshot
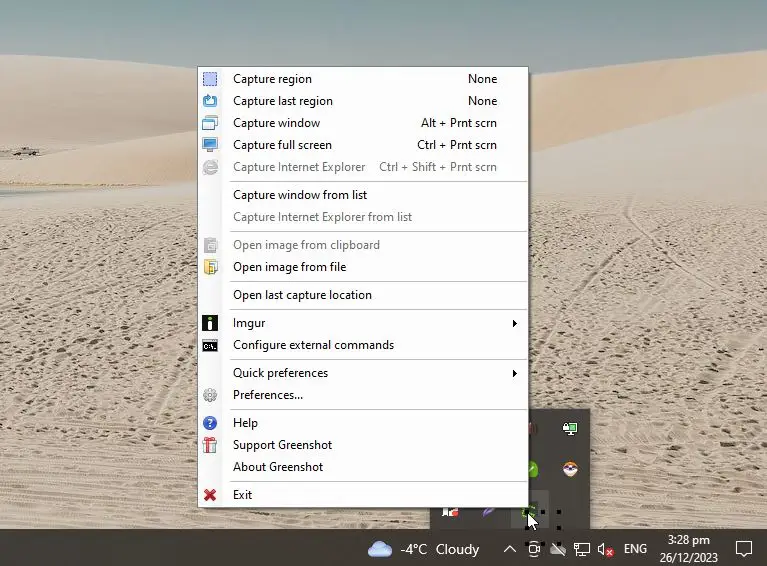
- Install the app and run it (icon appears in the system tray).
- Press "Print Screen (PrtScn)" to open capture options.
- Select full display, active window, or a region.
- Adjust the result in the built-in editor if needed.
- Save or copy the image.
Pros:
- Free and open-source with no ads or limitations.
- Editor for quick annotations and highlights.
- Easy to use with customizable hotkeys.
Cons:
- No video recording.
- Requires installation.
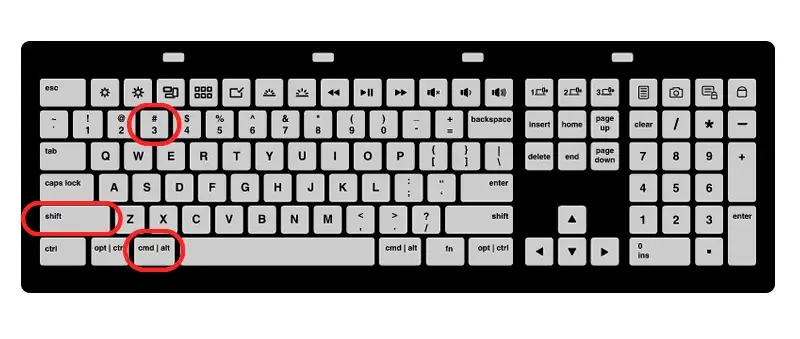
Shift + Command + 3
Capturing a screenshot on a MacOS is simple. Simply hold down the correct key combination and the screen is captured. Here's a step-by-step guide to grabbing a screenshot of your Mac computer using two hotkey combos.
How to take a screenshot on macOS with Shift + Command + 3
To take a screenshot, press the "Shift + Command + 3" keys simultaneously. Your full-screen image will appear on your desktop as a .png file.
Pros:
- It works with all versions of macOS.
Cons:
- You can't access any media editing tools when you use this shortcut.
- If you are shooting multiple images at once, this method might be uncomfortable.
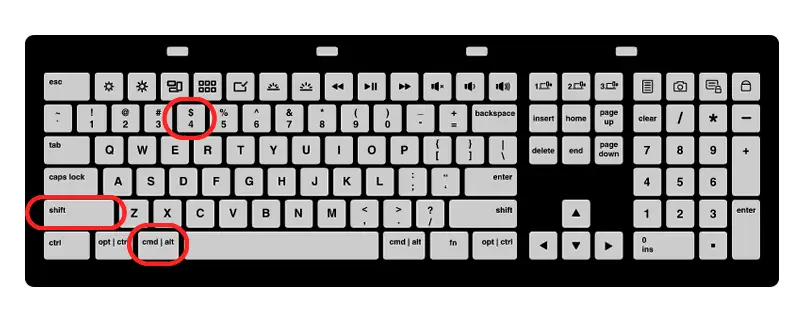
Shift + Command + 4
Another keyboard combination available for Mac users.
How to capture a screenshot on macOS with Shift + Command + 4
- If you want to screen capture just part of your display, press "Shift + Command + 4".
- Once your cursor will transform into a crosshair you can move over the area you desire to take in.
- Click and drag the mouse to select that area and then release the button. The capture will be stored as an image on the desktop.
You can also make a photo of an open window by pressing "Shift + Command + 4" and then hitting the spacebar. The cursor will change into a camera icon and you can click on any window you want to capture. The picture of the screen will be maintained as an image file on your workstation.
Pros:
- Take a screenshot without having to fumble around with other tools or programs.
- This method allows you to easily cast only part of the desktop or a particular window.
Cons:
- It also doesn't allow for any advanced features like annotations or watermarks, which can be useful if you're creating tutorials or how-to guides.
Reasons to take a screenshot on PC
A desktop screenshot is an image taken of what is displayed on a computer, laptop, tablet, or smartphone. It's a way to save what's on your display at a specific moment in time.
Using screen captures on your PC may be a superior option for taking and transmitting data promptly and with no difficulty. Here are some of the top reasons why you should think about capturing screenshots on the computer:
- Easily capture moments. Taking a screenshot makes it simple to capture occasions that you wouldn't be able to otherwise, such as when you're playing a game or watching a movie.
- Share information quickly. If there's something important that you need to communicate to someone, a snapshot is the quickest route to achieving it.
- Save time. Capturing a screenshot is much faster than writing down or typing out the data that is to be disseminated.
- Keep track of things. You can use screen images to keep track of things like conversations, websites, documents, and more.
- Create tutorials. They are ideal for constructing instructions or guides.
- Capture errors. If your computer is acting up, screenshotting can help you capture errors and other issues.
Screenshot taking tips
- Copy and paste. You can copy and paste a desktop screenshot from one program to another. Press "Ctrl + PrtScn" keys together to capture the active window or "Alt + PrtScn" for just a section of your screen.
- Screenshot URL. If you desire to distribute a screenshot with someone over the internet, use a service like Icecream Screen Recorder. It will upload the picture and give you a URL to share screenshot directly from your browser.
- Annotate screenshots. Add annotations such as arrows or text boxes to highlight important elements.
- Use Dropbox. If you want to save your screenshots in the cloud, consider using Dropbox or Google Drive so they can be accessed from anywhere at any time with an internet connection.
- Paste into emails. To quickly attach a PC screenshot to an email, press "Ctrl + V" after taking the picture. It will be automatically inserted into the body of the message.
Screenshotting FAQs
- How can I take a screenshot of a webpage that requires scrolling?
- There are browser extensions and software tools available that allow you to take screenshots of entire web pages. These tools capture the whole page by stitching together multiple screenshots automatically.
- Can I make a screenshot if my device's screen is not functioning properly?
- If your device's display is unresponsive or malfunctioning, taking a screenshot using traditional methods may be difficult. However, some devices offer alternative methods for capturing the screen, such as using hotkeys. If these options aren't available, you may need to seek assistance from a technician.
- Can I take screenshots of DRM-protected content, such as movies or streaming videos?
- No, DRM protection prevents you from screen recording movies or streaming videos. In most cases, attempts to capture DRM-protected content will result in a blank or black screen.
- How do I capture a screenshot using voice commands?
- On devices with voice assistant support, like Siri or Google Assistant, you can say things like "Take a screenshot" to capture your screen.
Conclusion
Acquiring a screenshot on a PC is a simple procedure that can be completed with a few straightforward steps.
To ensure a successful screenshot, remember to pay close attention to where you want to capture your image and also make sure to save it in a suitable format for your desired purpose.
Overall, capturing an image on a personal computer is painless and easy. With a few minutes of practice, you can easily become an expert at this!


