How to Make a Slideshow with Music and Pictures
Making a slideshow with musical accompaniment is an excellent method to present a compilation of photos, videos, and other visuals in an engaging way. It can be used to create presentations, highlight special occasions, or just for fun.
But how to make a slideshow with music and pictures for free? In this article, we'll talk about the costless ways to craft an animated clip from pictures with background audio.
Knowing how to properly assemble a sound panel can greatly impact the effectiveness and memorability of a composition.
Summary table of slideshow makers
| Application | OS | Output quality | Our ranking |
|---|---|---|---|
| Icecream Slideshow Maker |
Windows
|
High
|
5.0 |
| iMovie |
macOS
iOS
|
Good
|
4.5 |
| Keynote |
macOS
iOS
|
Good
|
4.3 |
| Clipchamp |
Windows
Web
|
Good
|
4.5 |
| Windows Movie Maker |
Windows
|
Fair
|
4.0 |
| Canva |
Web
|
Fair
|
4.0 |

How we chose the programs
To ensure the accuracy of our guide on how to make a photo slideshow with music for free, we conducted a thorough testing process.
First, we gathered a variety of pictures and tracks. We then utilized various free software programs and tested each for ease of use, functionality, and overall quality of the final product.
Thanks to our research, we are able to provide you with accurate instructions and outline the pros and cons of each method. This will help you confidently choose the best way to compile a presentation.
1. Icecream Slideshow Maker
Icecream Slideshow Maker is available for Windows OS and allows you to create a high-quality video in just a few minutes.
The software's simple interface makes it possible to work not only for professional designers but also for amateurs.
How to make a slideshow with music and pictures for free
Step 1. Download the program, run the setup process, and open it to proceed.
Step 2. Put pictures to create slides. You can upload photos by folder or one at a time. Drag and drop depictions right into the app's window or via the "Add file" and "Add folder" buttons. All the popular formats like JPG, TIFF, PNG, and others are supported.
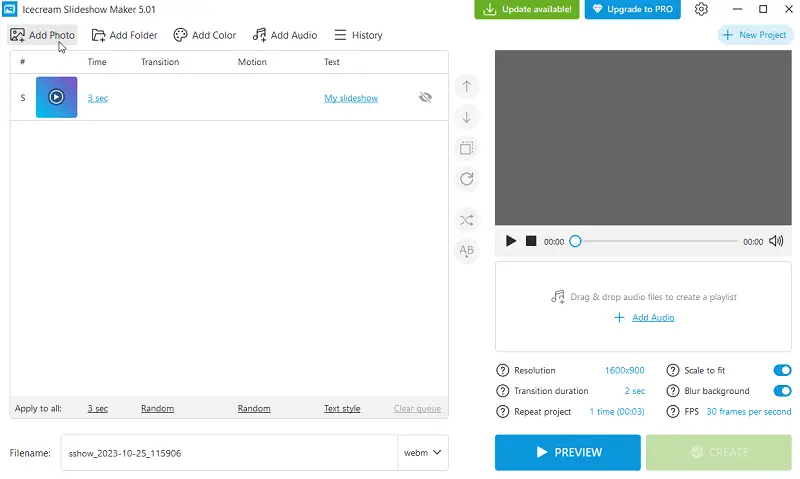
Step 3. Set the transition effects between the segments and their duration (can be applied to each pic individually or to the whole queue).
Incline text and blank slides (the "Add Color" button), and blur the background if some visuals do not fit the output resolution (which you can also set). Sort pages manually, shuffle, or arrange them in alphabetical order.
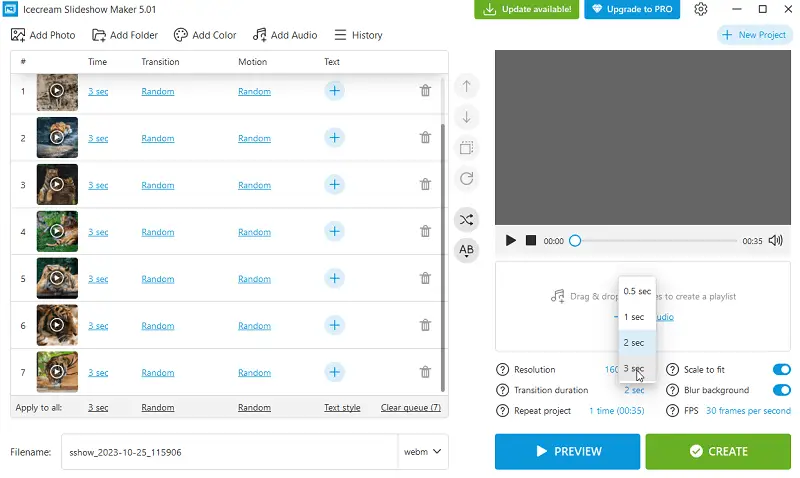
Step 4. Right about time to insert track to your video by clicking the "Add audio" button under the preview player. All popular extensions are supported, such as MP3, M4A, WAV, etc.
Form a playlist if you're planning to make a long slideshow with music in the background. Loop the song to play continuously, apply fades, and offset if necessary.
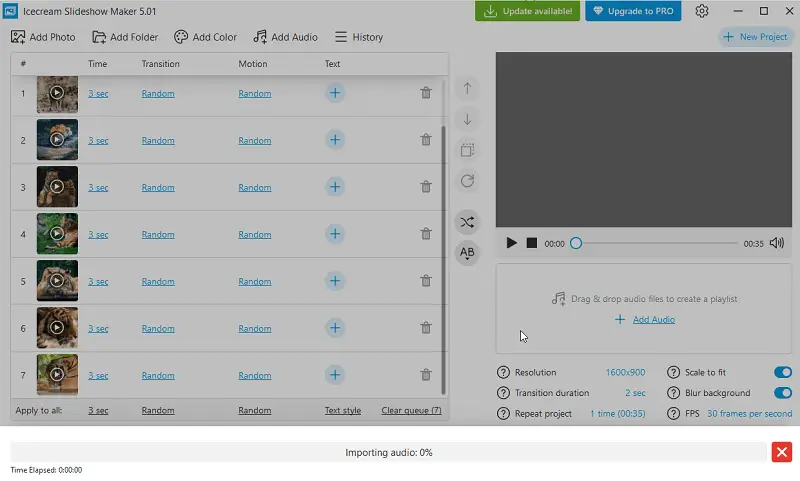
Step 5. Preview the result in the built-in player of the free slideshow software.
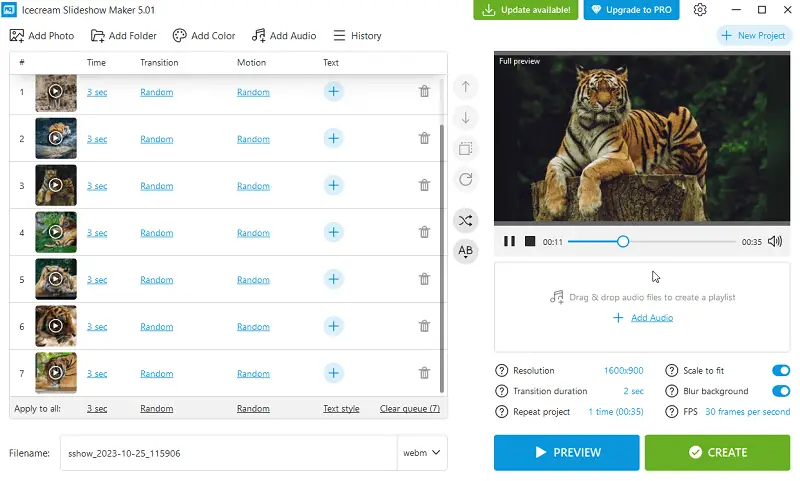
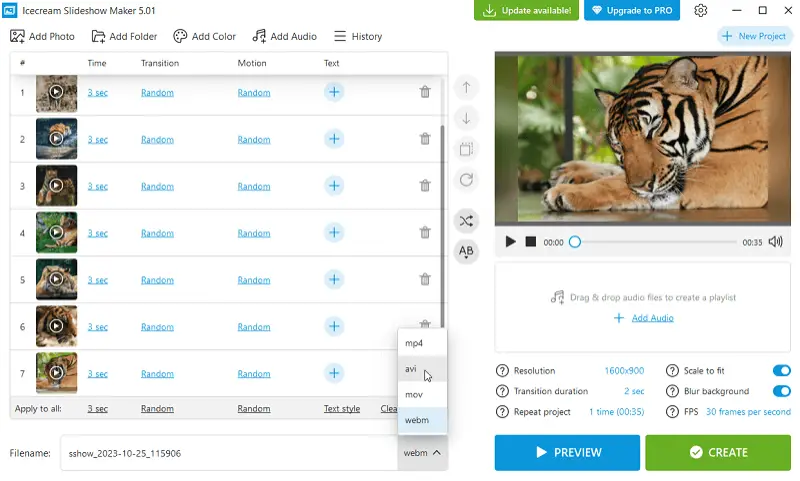
Step 6. If everything looks good then adjust the output format and enter a custom name. Then hit the "Create" button.
Additional tools
Not only you can create a photo presentation with music, but also set the display timing, and incorporate transitions and text content to the pictures. In addition to all of this, you can rotate the footage and duplicate them.
The program also lets you instantly upload the presentation to YouTube, Google Drive, and Dropbox, or immediately burn the video to a DVD.
Pros:
- Great functionality even in the free version of a slideshow maker;
- Flexible settings that will be understandable to beginners;
- A number of options, settings, and presets;
- High speed of converting and saving files;
- Low demand for technical capabilities of your computer.
2. iMovie
Creating a slideshow with music in iMovie is a simple process that allows you to add a dynamic touch to your photos. This native Apple software is a good choice for macOS or iOS since it does not require a third-party application.
How to make a free slideshow with music in iMovie
Step 1. Open the utility on your PC or phone.
Step 2. Hit "Create New" and choose "Movie" to start a new project.
![Create a new project in iMovie] Create a new project in iMovie](https://static.icecreamapps.com/storage/uploads/webp-png/imovie-1.webp)
Step 3. Add the photos you want to include by clicking the "Import Media" button.
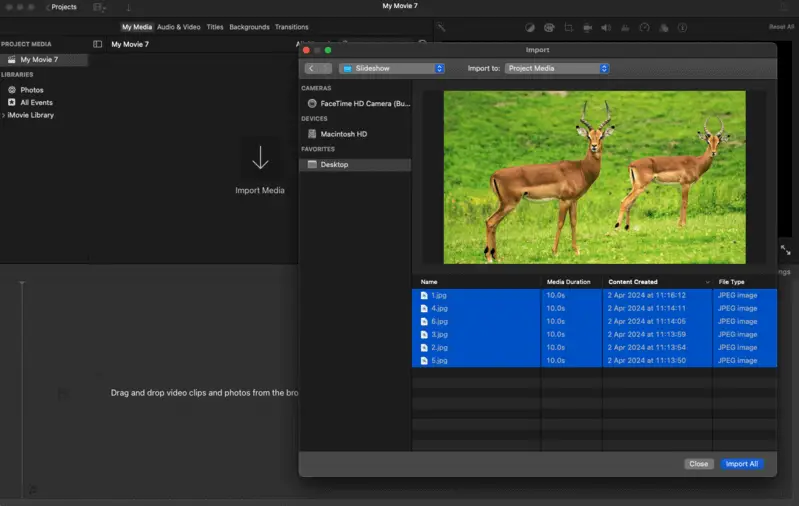
Step 4. Move the items from "My Media" to the timeline in the order you want them to appear in the video.
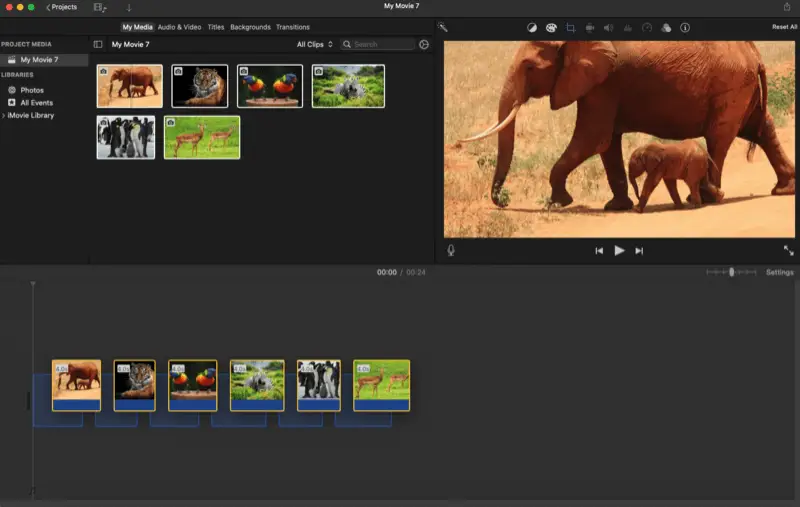
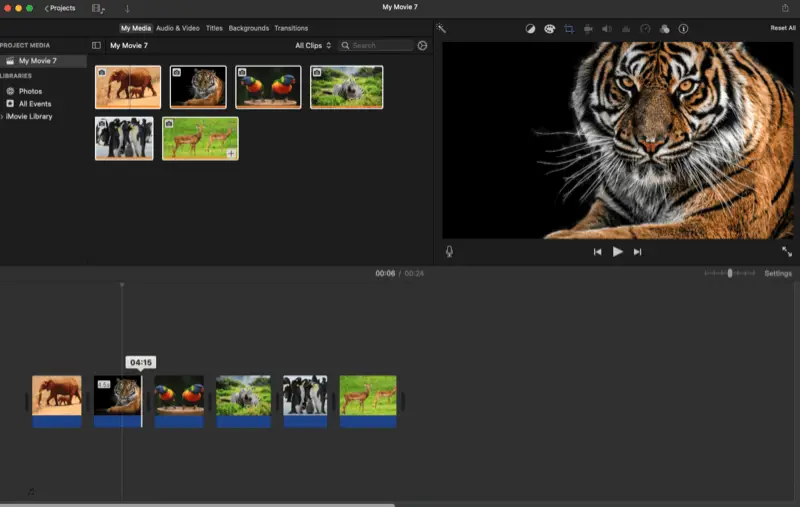
Step 5. Adjust the duration of each slide by dragging the edges to make it longer or shorter.
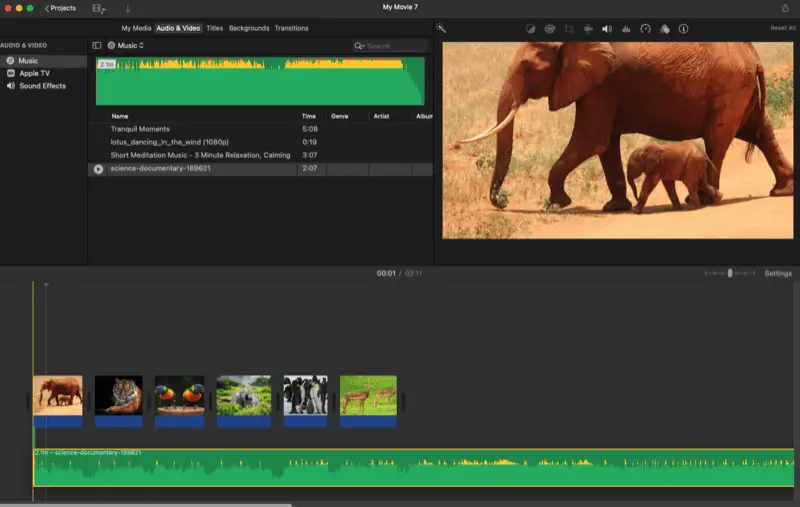
Step 6. Open the "Audio & Video" tab and select the song you want to insert from your iTunes library or iMovie's built-in soundtracks. Place it on the timeline.
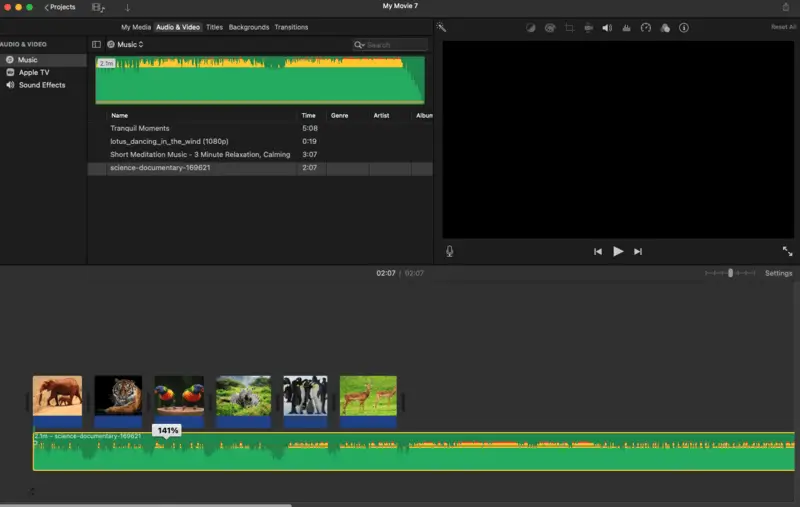
Step 7. You can adjust the volume by moving the volume slider.
Step 8. Press "Transitions" to select the smooth changing effects for your slides.
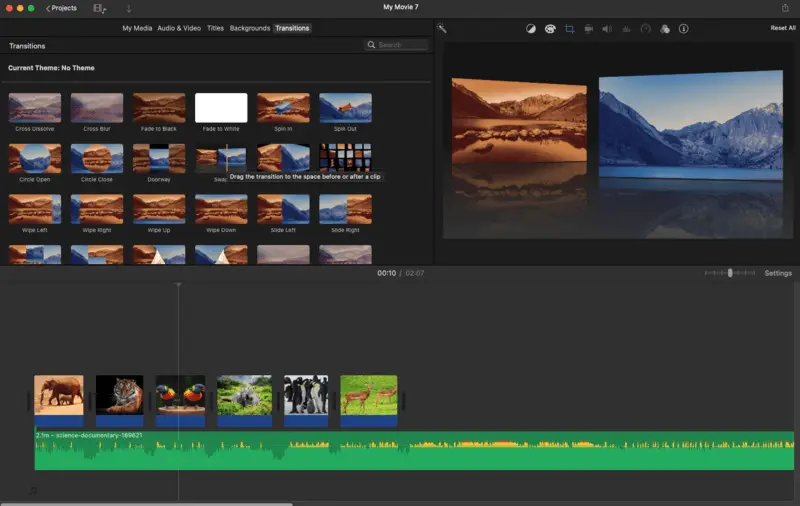
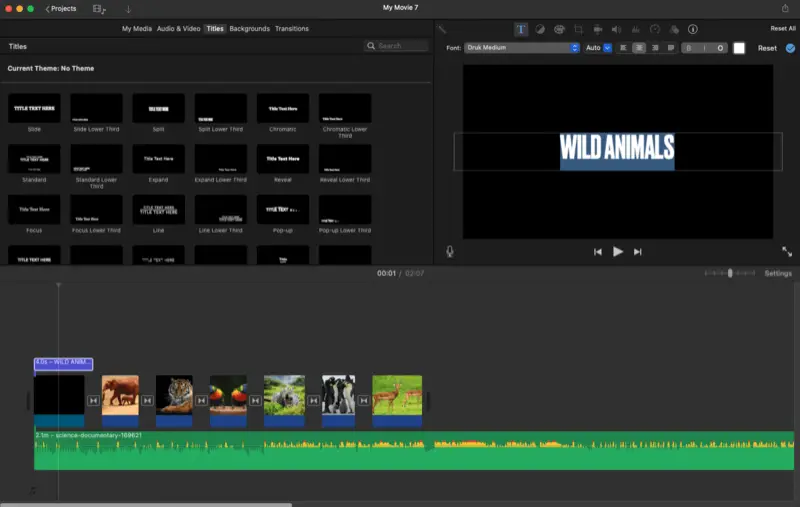
Step 9. Click "Title" to incorporate text to your slideshow (intro, captions, credits, etc.). You can apply them to your existing slides or go to "Backgrounds" and add a blank page.
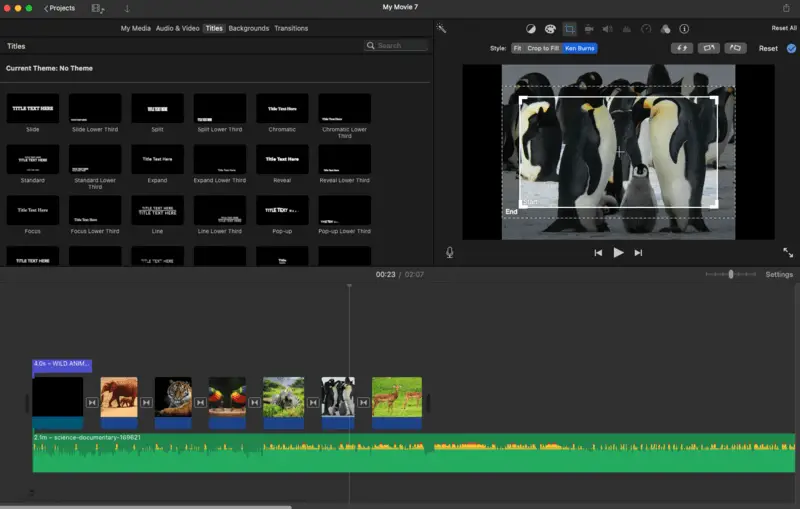
Step 10. To adjust the Start and End position of the panel's motion effect (applied automatically), select the needed page and press the crop icon above the preview.
Step 11. Once you're satisfied with the result, you can preview it via the play button.
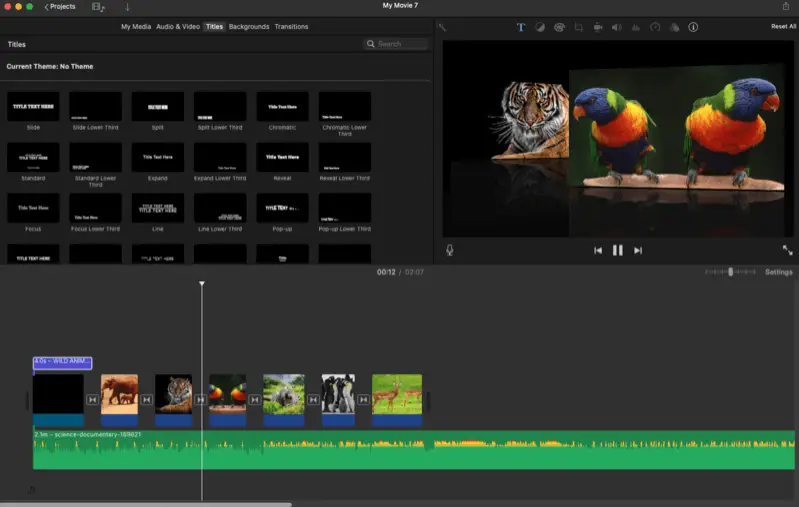
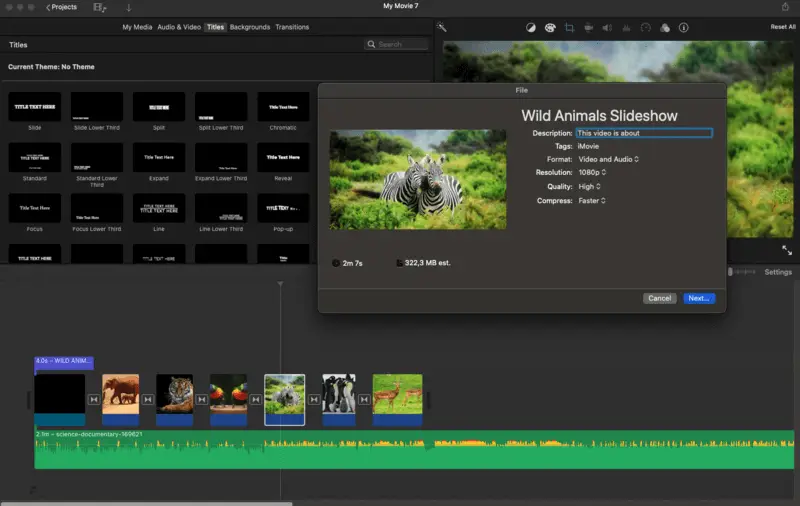
Step 12. Finally, when you're ready, hit the export icon and opt for the "Export File" menu to create a slideshow. Change the file name and tags, etc. Press "Next" to pick the location and save your output.
Pros:
- The app offers a user-friendly interface, making it easy to complete the task without much prior experience in video editing.
- iMovie seamlessly integrates with your photo and iTunes libraries, allowing you to quickly import pictures and music.
- There is a variety of built-in titles, slideshow templates, transitions, and effects that you can utilize to enhance your presentation and make it more visually appealing.
Cons:
- The audio editing capabilities are limited to adjusting the volume level and adding fade-in and out effects.
3. Keynote
Keynote is a powerful software designed for macOS and iOS. It is part of the iWork kit, which also includes Pages (for word processing) and Numbers (for spreadsheets).
How to create a picture slideshow with music in Keynote
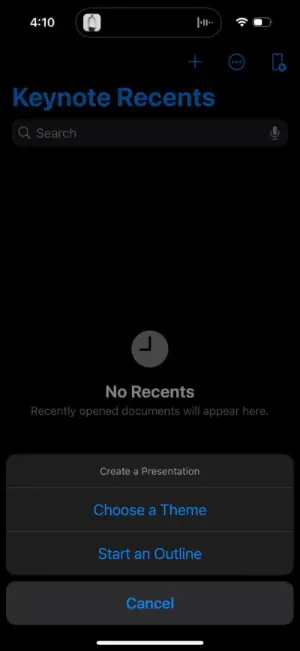
Step 1. Launch the app and tap on the "+" icon to create a new project.
The program offers various themes to style your panel. Click "Choose a Theme" to pick one that suits the mood or content of your presentation.
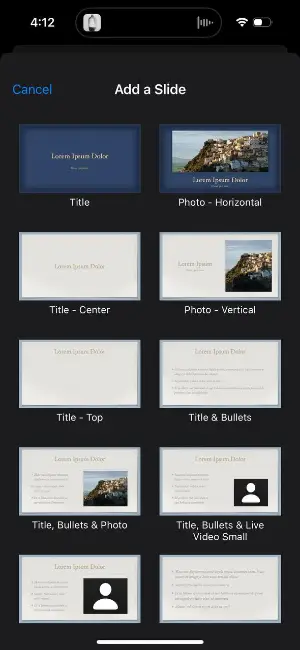
Step 2. Tap "+" on the left side to make a new slide. Use the same button to insert a photo.
You can import existing media files from the app or open the camera to take new pictures.
Step 3. Hold and drag slides to reorder them.
If you want to edit the photo, click on it and tap the brush icon in the upper right corner of the screen. You can apply various styles, rotate, flip, remove background, and more.
Step 4. Go to the page where you want to insert song (typically the first or title slide). Tap the "+" button and choose either "Record Audio" or "Insert from...".

Step 5. Utilize "Play" (the triangle icon) to preview your slideshow with music. Choose "Share" to export the result. You can share it via AirDrop, Messages, Mail, or save it to Files.

Pros:
- Seamless integration with iCloud and other Apple services makes it easy to access and share your presentations across devices.
- You can customize slides with various themes, animations, and transitions, which gives you creative control over the look of your deck.
- There are options the rehearse the output and enable remote control to change the slides with your iPad, iPhone, or Apple Watch.
Cons:
- Keynote files (.key) are not as universally compatible, which can be an issue if sharing outside the Apple ecosystem.
4. Clipchamp
Clipchamp is a free video editor that can help you create amazing slideshows with music. With its intuitive interface and features, it's a good tool to build beautiful presentations.
How to make a clip of pictures with audio using Clipchamp
Step 1. Launch the application.
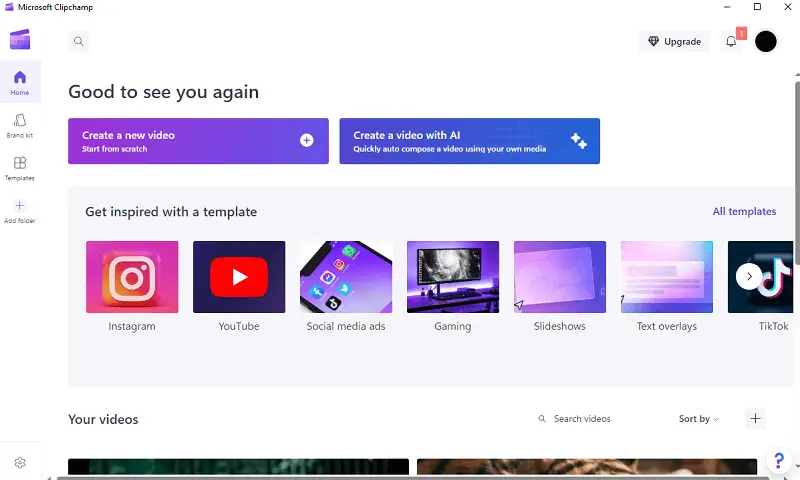
Step 2. Click the "Create a new video" button.
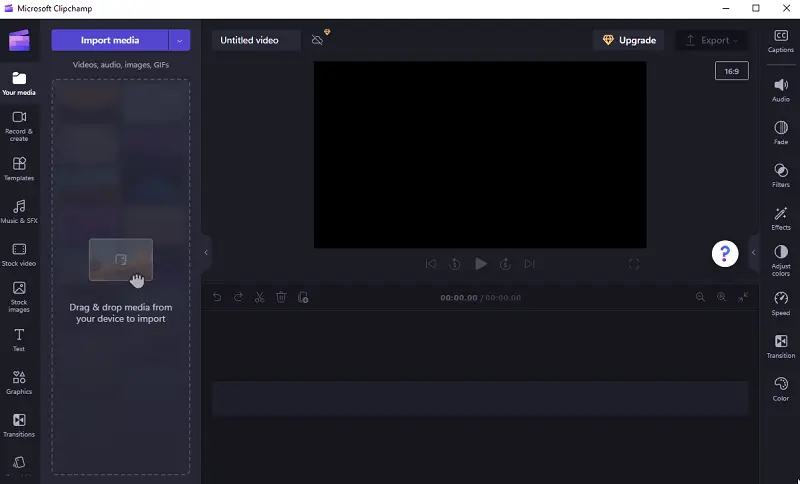
Step 3. Add your own pictures, audio, and clip from your library, or utilize stock footage. To do this, press "Import media" or simply drag and drop the content. Then, transfer the chosen photos on a timeline. Click on the footage to adjust colors, filters, and effects.
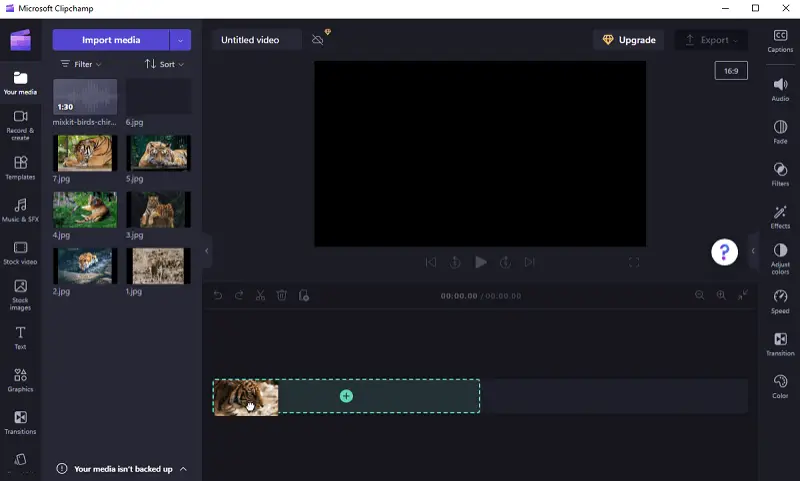
Step 4. Hit "Audio" to set the volume of the track. Manage the fade in/out setting and change the speed if needed.
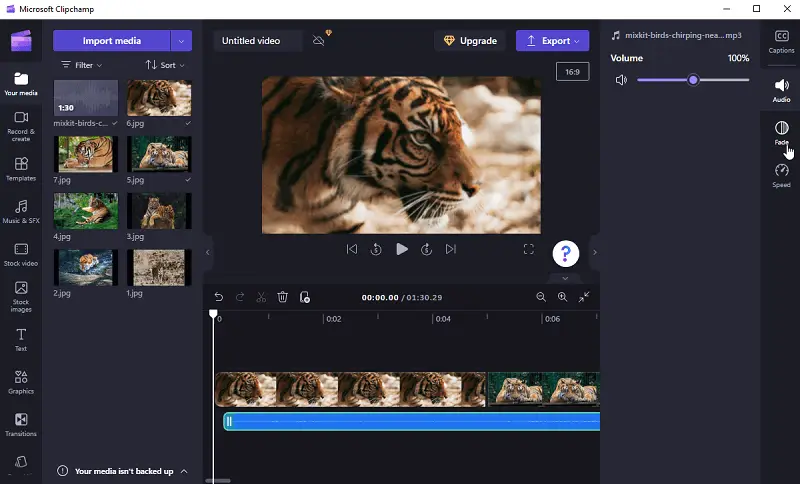
Step 5. Preview your project before you export it.
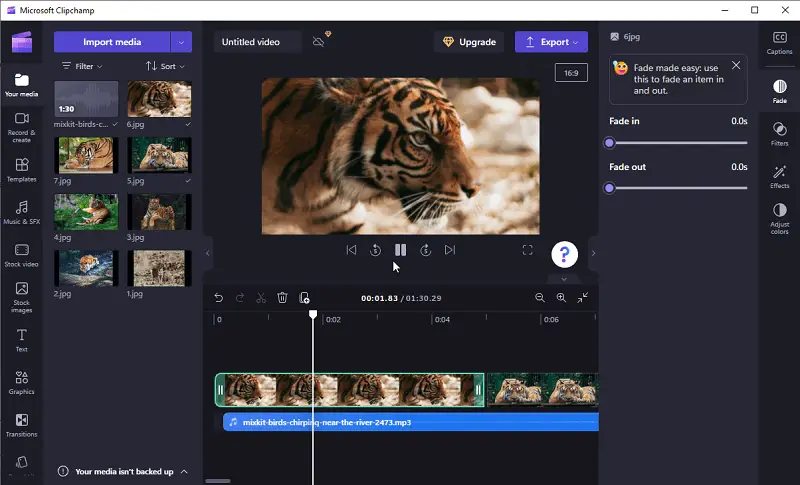
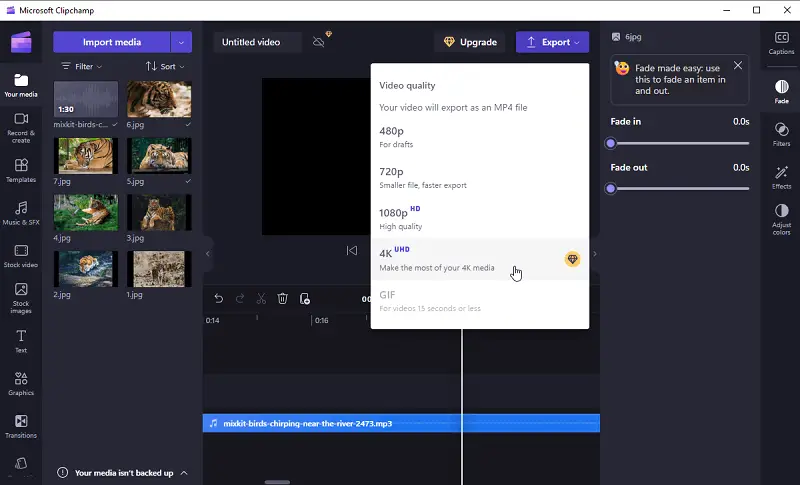
Step 6. Press "Export" to choose the quality and save your slide presentation.
Pros:
- Free to use, so you don't have to worry about paying for an expensive video editing program.
- You can create a captivating slideshow with music in just a few minutes.
- Offers a range of features, including typing text, making transitions, and adding background sound.
- You can export the output in 4K.
Cons:
- Only supports exporting your presentation in MP4 format.
- You can't insert animations to your slides.
- No editing of existing visuals.
- Exporting sequences takes a long time.
5. Windows Movie Maker
Movie Maker is a free editing software for Windows consumers. It can also be used to make a slide presentation from photos.
How to make a video with music and pictures in Windows Movie Maker
Step 1. Download and install the utility on your computer (if you don't already have it).
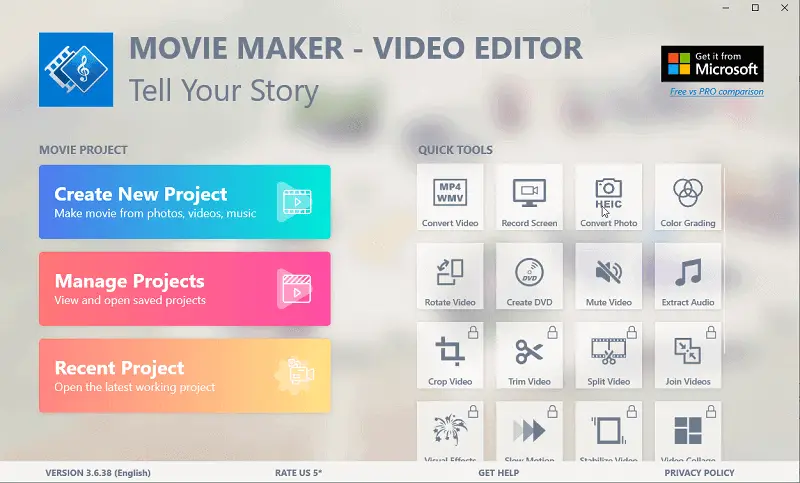
Step 2. Launch the program and start a new project via "Create New Project".
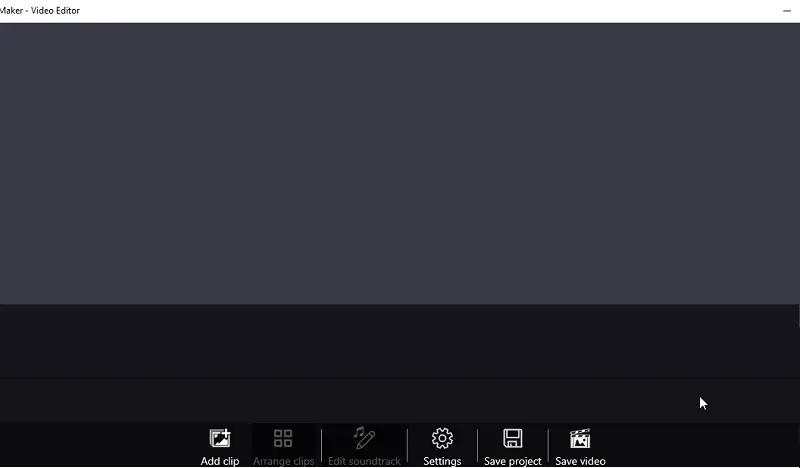
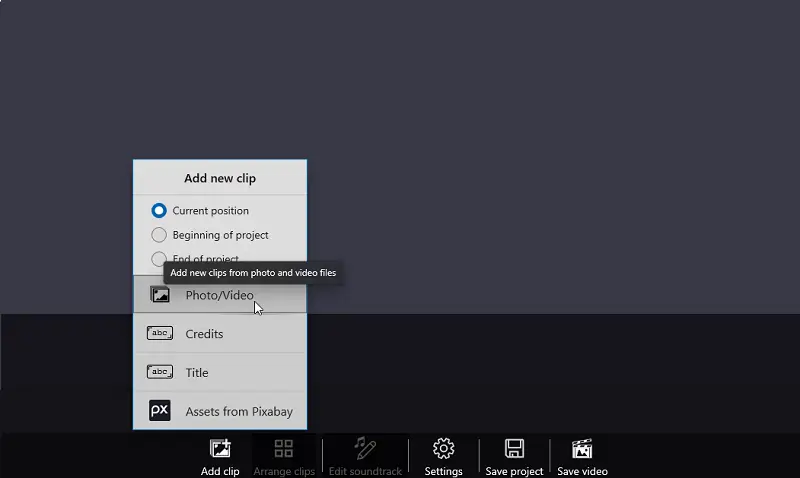
Step 3. To load footage, click "Add clip", then "Photo/Video".
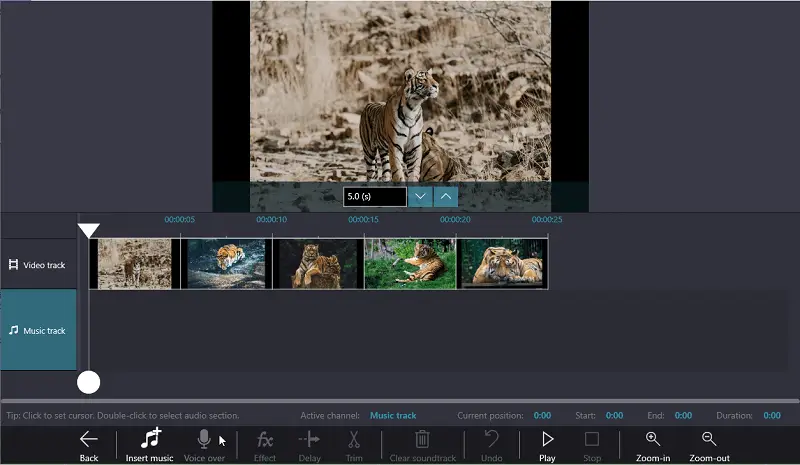
Step 4. Select the images you'd like to insert and drag them into the timeline below.
Step 5. To incorporate audile, press "Edit soundtrack". There you can pull music or voice-over from your PC or take stock sounds. After the track is inside, trim it or lay effects over it.
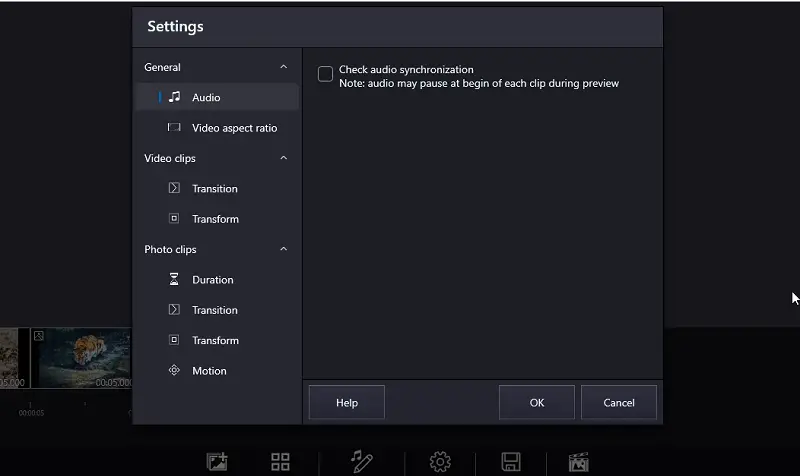
Step 6. Now, adjust the settings for your future photo presentation. Choose the aspect ratio, transitions, and motion effects.
To customize your slideshow, you can set the duration of each image by selecting one or more items, and then dragging them left or right on the timeline until they are just the way you want them.
Step 7. Once you're happy with your work, click "Save video" or "Save project".
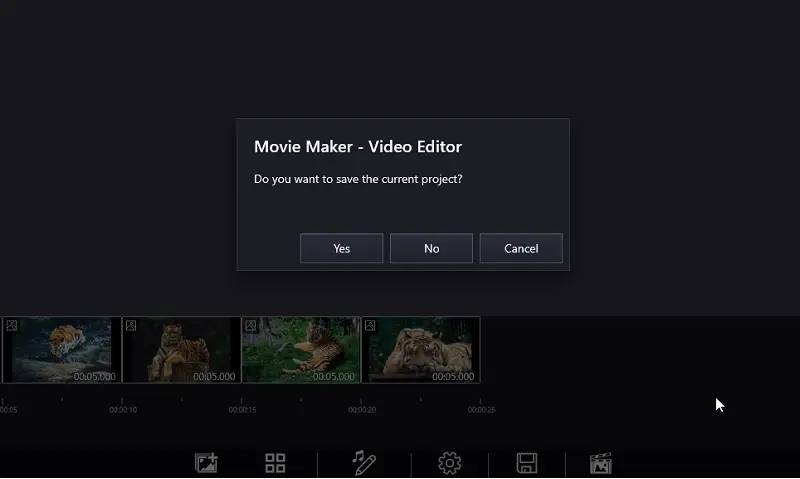
Pros:
- It's free and easy to download.
- Slideshow maker has a simple UI.
- Wide choice of transitions.
- Ability to add voiceovers and presence of built-in tracks.
Cons:
- No visual effects adjustments.
- Audio overlay is impossible.
- Video editing software may be slow and lag when working with large files or complex projects.
6. Canva
Canva is a popular design tool employed to make attractive decks. Manipulating this online slideshow maker is a breeze, and it offers lots of customization options.
How to make a free slideshow with music online in Canva
Step 1. Log in and pick "Presentation" from the design types.
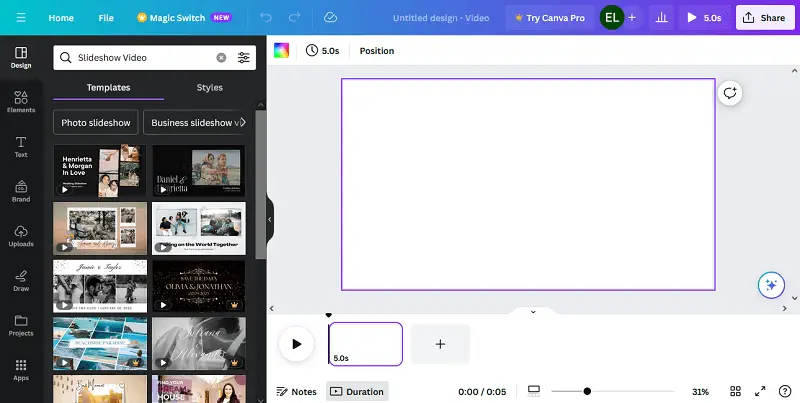
Step 2. Select a template you like or start from scratch. You can sort slideshow templates by theme to make it easier to find the one you like.
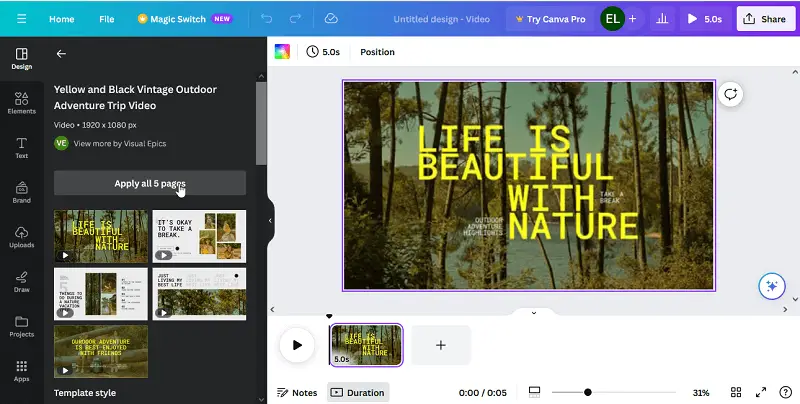
Step 3. Add photos, illustrations, shapes, lines, and videos. Set the duration time and adjust the photo effects.
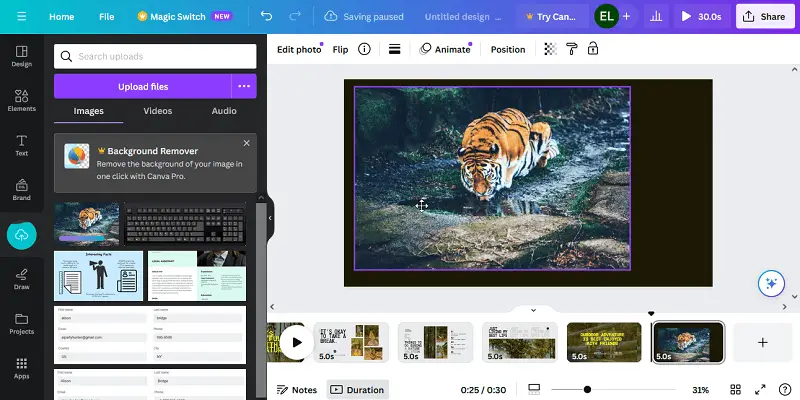
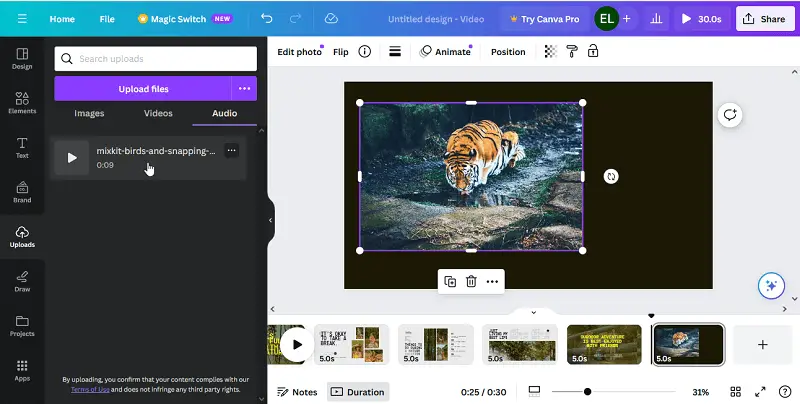
Step 4. Hit "Uploads" to add songs for each slide or for the entire creation. Set the audio effects, beat sync, and tweak the volume.
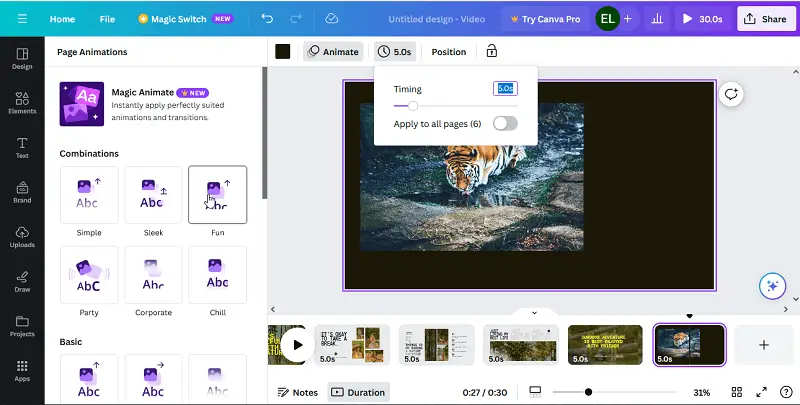
Step 5. Customize transitions between slides if desired.
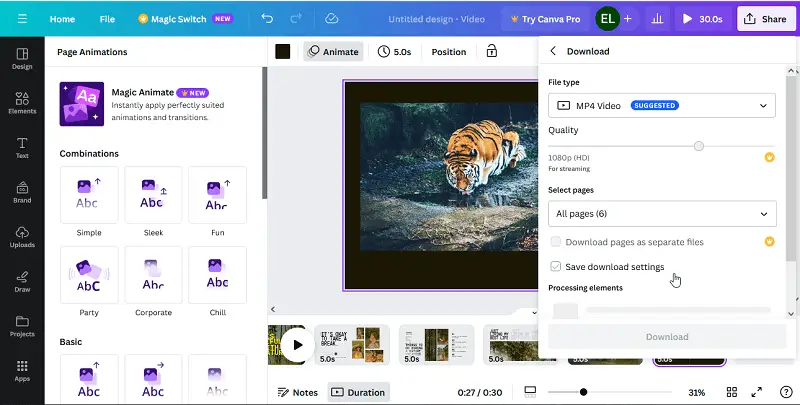
Step 6. Click "Share" when you are done and save your result as a video, PDF, PPTX, or image.
Pros:
- Cross-platform slideshow maker, so you can have access to your works from any device.
- You can customize the look of your slides with backgrounds, fonts, colors, and more.
- You may easily share your slideshows online or export them in different formats.
- Convenient autosave and collaboration features.
Cons:
- Most of the slideshow templates and stock depictions are not free.
- You cannot change the size of a pattern after you start working with it.
- Limited customization of footage and shapes.
FAQ
- What type of audio should I use?
- If you're making a slideshow with music, you can apply any song you want, as long as it's suitable for the occasion and doesn't contain any copyrighted material.
- Can I utilize popular songs?
- It’s often safer to take royalty-free track unless you have permission.
- Can I use lyrics in the music, or is instrumental better?
- Lyrics can be impactful if they align with the slideshow’s theme, but instrumental melody can often be less distracting and more versatile.
- Can I add voiceovers?
- Yes, some slideshow creators offer the possibility to capture and embed audio narrations. You can also employ an audio recorder to capture sound and then add it to your slides as an audio file.
- What is the best resolution for my pictures?
- High-resolution visuals (at least 1080 x 1080 pixels) will guarantee that your presentations look sharp and professional on any device.
- Is there a limit to how many images I can include in the slideshow?
- It depends on the slideshow maker you're using. Some apps may have limits on the number of photos you can incline while other applications may not have any limit at all.
Tips
- Start with your visuals. Select your footage and clips before you begin creating a slideshow with music.
- Choose a theme. Templates will guide the creation of your presentation, and can serve as a connection between the depictions.
- Keep it simple. With decks, less is more. Leave the panel short, concise, and to the point.
- Add song. Audio helps create a mood and adds emotion. Choose something meaningful for the deck you have picked out.
- Think about timing. The sequence of your music should match the the slides. Aim for a few seconds per page, and adjust if necessary.
- Balance levels. Make sure that the melody is not overpowering the visuals by tweaking the volume levels accordingly.
- Be creative. Don't be afraid to experiment with transitions, effects, or other tools available.
- Optimize for different devices. Consider how people will be viewing your presentation - on a computer, tablet, or phone. Verify that all is looking good across different devices before sharing it with others.
- Test it out. Before sending your slideshow verify you take the time to view it yourself and check that everything looks and sounds right.
Common issues
| Problem | Troubleshooting |
|---|---|
| Slideshow not exporting | Free up disk space, update the app, or restart the app |
| Slow performance | Close unnecessary programs, simplify the project |
| Audio syncing issues | Ensure correct format and refine timeline alignment |
| Software crashes | Update drivers, reinstall the tool, or check for updates |
| Blank or black screen on export | Alter settings or update the software |
| Missing transitions or effects | Reinstall the tool or check configuration |
| Low-quality output | Set export to a higher resolution or change settings |
| Audio not playing in preview | Convert the file to a compatible format or check volume levels |
Conclusion
In conclusion, making a slideshow with music is a great way to capture and share special moments. With the help of this guide, you should now have a better understanding of how to do it for free.
To ensure your presentation turns out perfect, it is essential to keep a few things in mind while creating it.
Remember to choose the right images. Select pictures that are high-quality and meaningful. Then, think about what track will best enhance the output. Finally, be sure to check for any copyright restrictions before downloading your songs.
By following these tips, you can make an attractive musical slideshow that everyone can appreciate. So go ahead, choose the slideshow makers that works best for you, and get started creating your own masterpiece!


