7 Best Windows Screen Recorders with Audio
The demand for high-quality screen recording software has never been greater. Whether you're creating video guides, capturing gameplay highlights, or delivering professional presentations, the ability to record your screen with crisp audio is indispensable.
Fortunately, there are a lot of Windows screen recorders with audio to cater to diverse needs and preferences. In this article, we will explore 7 different options from built-in features to third-party software for capturing audio while recording your screen.
Option 1: Icecream Screen Recorder
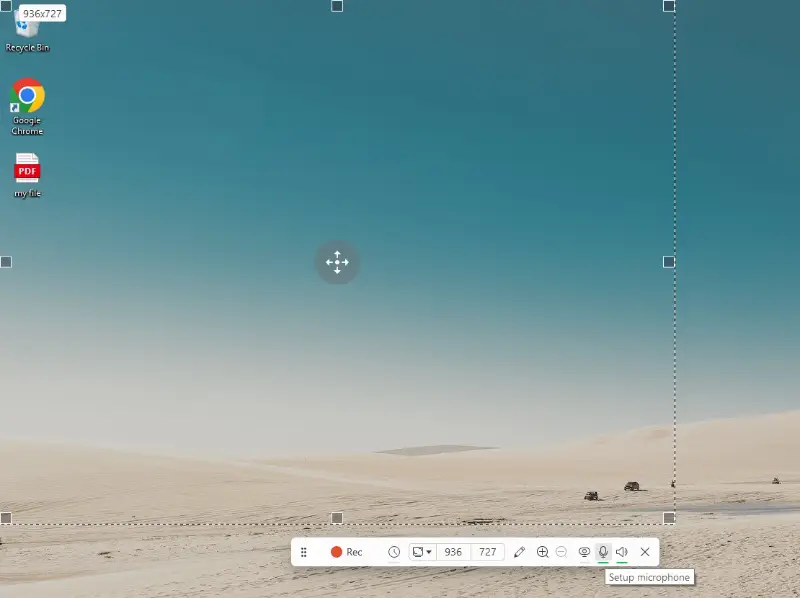
Icecream Screen Recorder is versatile software designed for capturing any area of your display. Renowned for its intuitive interface, the program allows users to record their computer screen and audio from both microphone and system sources.
How to record screen with audio using Icecream Screen Recorder
- Download and install the free Windows screen recorder with audio from the official website.
- Before starting the recording, you can adjust various recording settings such as video quality, audio source, and more.
- Hit the "Capture video" button and choose to record the full screen or a specific part.
- Once you've selected your desired area, click "Rec" to start the process.
- When you're done, stop the recording. It will automatically open in a preview window where you can edit it if needed and save it on your computer.
While screen recording with audio, you can pause the process or make annotations at any time by clicking the corresponding buttons on the toolbar.
Pros:
- User-friendliness. The screen recorder for Windows features an intuitive interface that makes it easy to navigate and operate.
- Versatility. It allows users to capture any area of the screen with customizable recording parameters.
- Audio recording. The program enables users to screen record with their voice and capture system sources simultaneously.
- Scheduling options. The program offers the option to schedule video recordings, automating the process for more convenience.
- Annotations. You can add text, shapes, and arrows to their recordings in real time, enhancing clarity and communication.
- Webcam. The video recording software supports webcam integration, allowing users to include additional footage in their recordings.
- Built-in editor. It comes with an integrated video editor with no watermark that allows users to trim recordings, add basic effects, and merge multiple clips effortlessly.
- Customizable hotkeys. You can set up custom hotkeys for various recording functions, enhancing efficiency and productivity.
In conclusion, Icecream Screen Recorder is a reliable and convenient way to record your screen with audio on Windows. Its versatile recording options and built-in video editor allow users to create high-quality clips for various purposes.
Option 2: Built-in Windows screen recorder
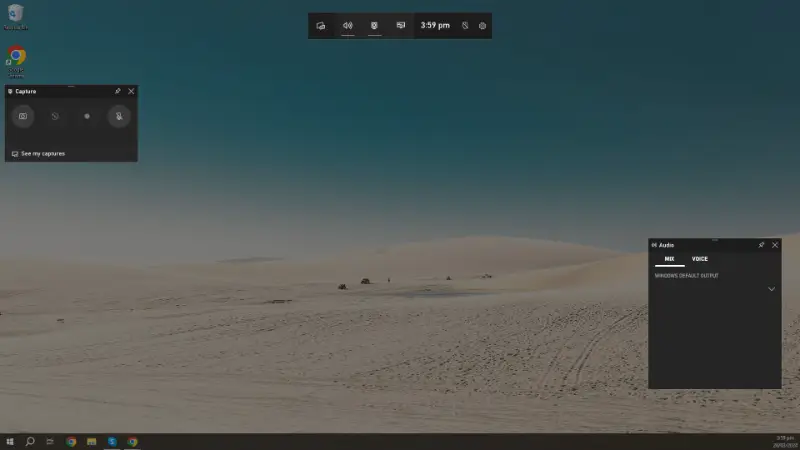
Game Bar is a free screen recorder pre-installed on Windows and designed primarily for capturing gameplay footage. However, it doubles for general purposes and gives you a quick way to record the screen activity with audio.
How to screen record with voice using Game Bar
- Launch the application or window that you want to screen record.
- Press the Windows + G keys to open the Game Bar.
- Click the "Capture" tab in the top menu and enable the microphone if needed.
- Hit the "Start recording" button (or press Win + Alt + R) to record your screen on Windows.
- A small toolbar will appear in the uppermost section of your screen, indicating that you are recording.
- Once you're done, press the "Stop" button (or hit Windows + Alt + R again).
The recorded video will automatically be save in your videos in a folder called "Captures".
Pros:
- Built-in integration. The screen recorder comes pre-installed with Windows 10 and 11, eliminating the need for third-party software downloads.
- Ease of access. It can be easily accessed by pressing a hotkey combination, making it convenient for quick screen recording.
- Audio recording. The video recording software lets users record audio from both the microphone and system simultaneously.
- Lightweight. The tool consumes minimal system resources, ensuring smooth performance even during intensive tasks.
- Overlay features. Includes performance metrics like FPS, CPU, and GPU stats during gameplay.
Cons:
- Limited customization. Users have limited control over recording settings such as resolution, frame rate, and audio sources.
- Game focus. As the name suggests, the video capture software is primarily designed for gamers. It is not available for the Windows Desktop or File Explorer.
Overall, for gamers and casual users alike, Game Bar offers a simple and efficient way to record the computer screen and audio. While it may lack the advanced features of dedicated video recorder, its ease of access and integration with the operating system make it a convenient option.
Option 3: OBS Studio
OBS Studio, short for Open Broadcaster Software, is a free video and audio recorder. Initially developed for streaming purposes, it has evolved into a comprehensive tool for video recording any screen activity with audio.
How to record computer screen and audio with OBS Studio
- Download OBS Studio from its official website, install it on your computer and launch the application.
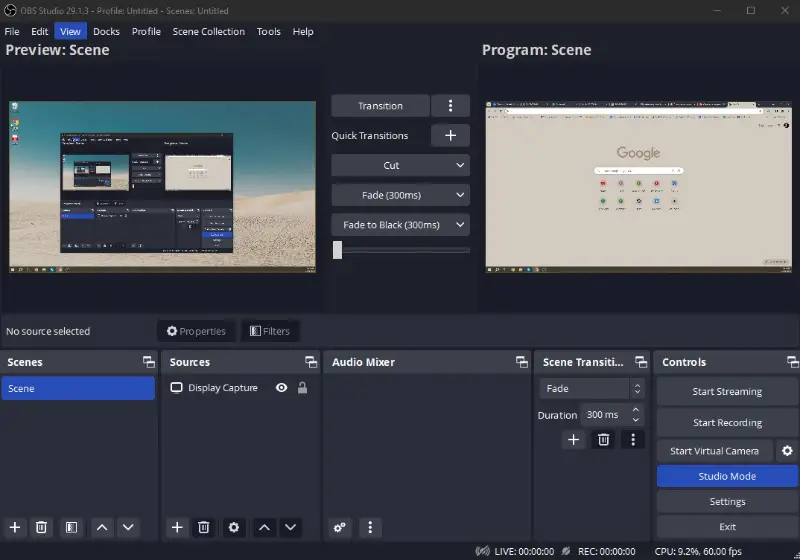
- Press "+" on the sources panel, select "Display Capture" and pick your device.
- Click the "+" button again, but this time choose "Audio Input Capture". Select your desired audio input device (e.g., microphone).
- Hit the "Start Recording" button at the bottom right corner.
- When you're done, click "Stop Recording" in the controls. The result will automatically be saved to the designated folder on your computer.
OBS Studio works with scenes and sources. A scene is like a canvas where you place your sources, such as your screen capture and audio inputs.
Pros:
- Open-source. The Windows screen recorder offers access to all its features without any cost.
- Customizable settings. Users have full control over the parameters such as resolution, frame rate, and audio sources, allowing for highly customizable recordings.
- Multi-source recording. The video recorder supports capturing from multiple sources simultaneously, including desktop, window, webcam, and microphone inputs.
- Editing tools. It offers a range of advanced features, including scene transitions, filters, and audio mixing capabilities.
- Studio Mode. Enables previewing and adjusting scenes before pushing them live—ideal for professional broadcasts.
Cons:
- Steep learning curve. The video recording software has a more complex interface compared to other applications in this article, which may require time to learn and navigate effectively.
- Resource intensive. Screen recording on Windows with this software can be resource-intensive, especially when capturing high-resolution video at higher bitrates.
OBS Studio is a powerful and versatile method for screen recording and live streaming, offering advanced customization options for users with diverse needs. While it may have a steeper learning curve compared to some other software, its extensive features make it a popular choice among content creators, gamers, and professionals alike.
Option 4: ShareX
ShareX is an open-source free screen recorder and file-sharing program that offers a wide range of features. It is available for Windows and provides users with a comprehensive set of tools for capturing, annotating, and sharing screen content.
How to screen record on windows with ShareX
- Download and install ShareX from their official website.
- Go to "Task Settings" , select "Screen Recorder" and click "Screen Recording Options".
- Under "Audio Source", pick the input device you want to use for recording. This could be your microphone or system audio.
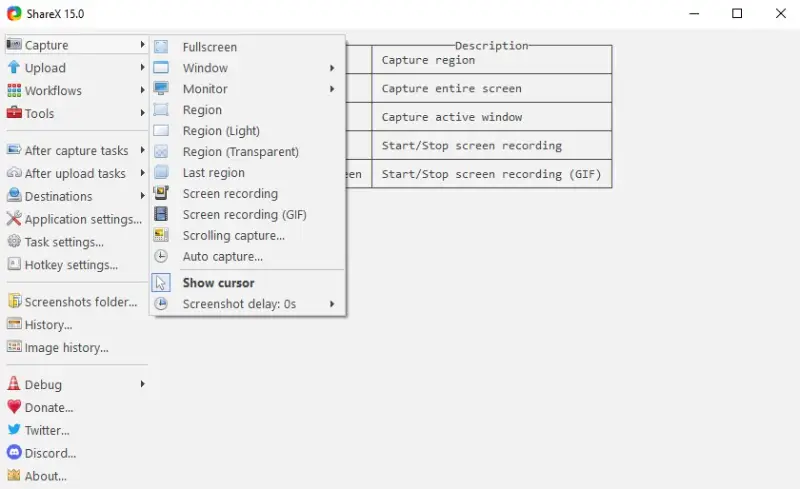
- Press the Shift + PrtScr hotkey, or click "Capture" in the main window and select "Screen Recording".
- To end the process, you can use the same hotkey combination, or you can hit the "Stop" button.
Pros:
- Capture options. Video capture software offers a plethora of options, including full-screen, window, scrolling, region snapshots, and more.
- Open-source. The Windows screen recorder with audio is completely free to use and regularly updated by its developers.
- Built-in editor. The software includes a built-in image editor with advanced features like cropping, resizing, adding effects, and applying filters.
- Advanced hotkeys. Offers detailed hotkey configuration for nearly every function, improving speed and efficiency.
Cons:
- Complex interface. Due to its extensive features and customization settings, the tool to record screen with audio may have a steep learning curve for some users.
With ShareX, you have the flexibility to record your computer screen and audio. Its wide range of capture options, annotation tools, and customization capabilities make it a popular choice among professionals, content creators, and enthusiasts.
Option 5: Bandicam
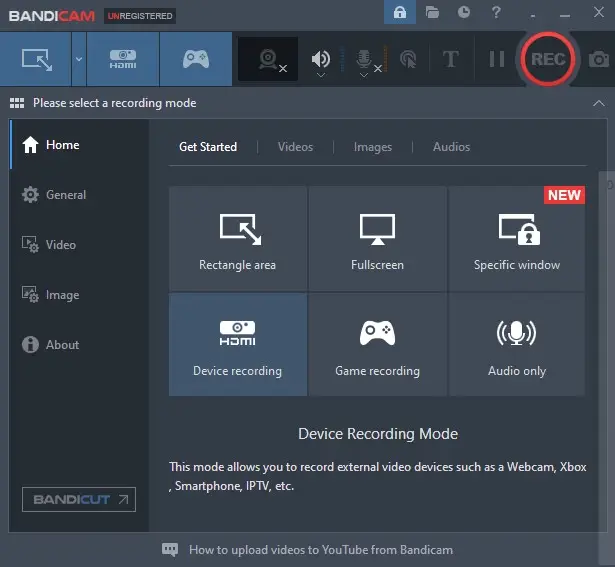
Bandicam is a lightweight video recording software designed for Windows users. It supports high-quality video capture along with audio, making it an excellent choice for gamers, educators, and professionals who need to create polished clips.
How to use Bandicam for screen recording on Windows
- Download and install Bandicam from the official website.
- In the toolbar, select "Record Speakers/Microphone".
- Choose your preferred input source (e.g., microphone, system audio, or both).
- Click the red "Rec" button or press the F12 hotkey to start capturing your screen.
- To stop the process, use the same hotkey or hit "Stop" in the interface.
Pros:
- High-quality recordings. Captures videos in HD with minimal performance impact.
- User-friendly. Intuitive interface and simple setup make it accessible for beginners.
- Multiple modes. Offers screen, game, and device recording modes for versatility.
Cons:
- Limited free version. The free version includes a watermark and has a 10-minute recording limit.
- Paid license required. Full functionality requires purchasing a license.
With Bandicam, users can easily record their screen with audio in high quality. Its straightforward design and advanced features make it a reliable option for various needs, from tutorials to gameplay videos.
Option 6. ScreenPal
ScreenPal is a specialized platform for creating, editing, and sharing professional-grade recordings, screen and face captures, and instructional videos. With its robust feature set, this Windows 10 screen recorder serves educators, content creators, corporate trainers, and marketers seeking efficient visual communication tools.
How to record screen with audio in ScreenPal
- Locate the installation package and install the program on your PC.
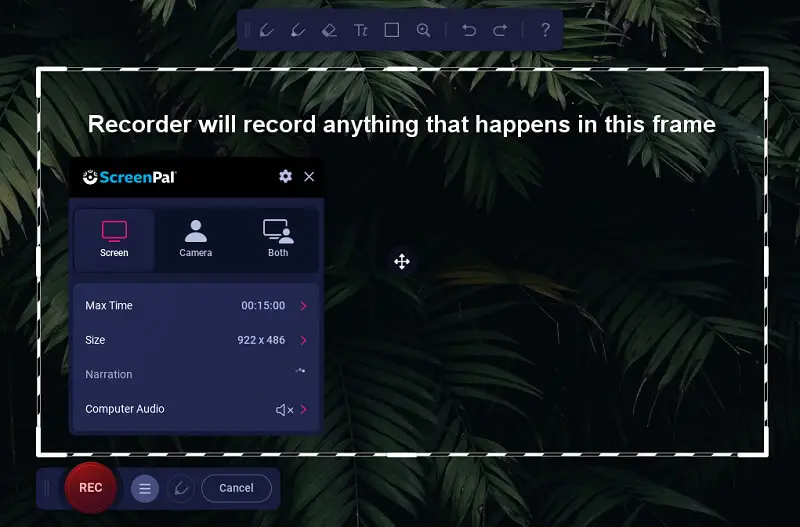
- Launch the app. Click "Record" on the main interface.
- Drag the frame to define the area of the desktop to capture.
- Ensure audio sources are enabled. Press the "Rec" button to begin.
- Hit "Done" when finished to stop the recording.
Pros:
- Audio flexibility. Capture both microphone input and system audio for comprehensive content creation.
- Annotation tools. Highlight areas, add shapes, or text overlays to emphasize key points.
Cons:
- Audio capture restrictions. System audio recording is unavailable without the subscription.
- Performance impact. High-resolution desktop recordings may slow down lower-end systems.
ScreenPal is a strong contender for casual creators but may fall short for power users seeking advanced video editing capabilities without third-party tools.
Option 7: Video Candy
Video Candy is a browser-based service that doesn't require installation. Perfect for fast tasks, it allows you to save visual content along with voice or system audio—all from within a clean, intuitive interface.
How to use it for screen recording on Windows or Mac
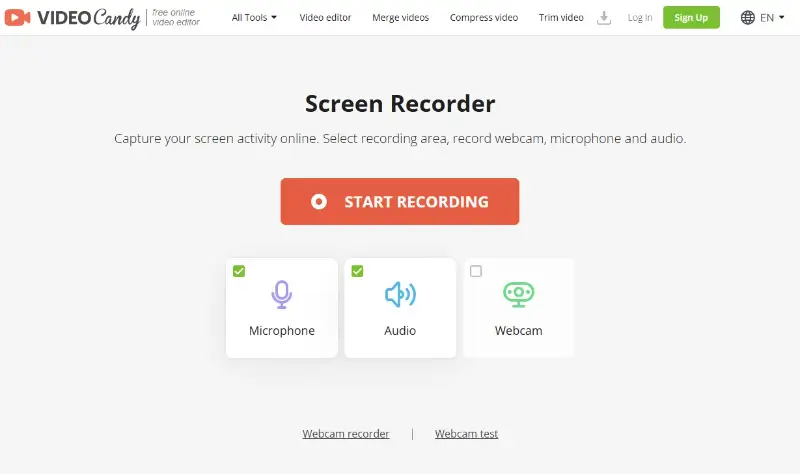
- Open the online screen capture tool in your preferred browser.
- Toggle on input options like "Microphone" or "Audio" as needed.
- Click "Start Recording" to initiate the session.
- Select the display type: full desktop, a specific window, or a browser tab.
- Press "Share" to begin capturing your chosen screen area.
- When done, download the output file directly.
Pros:
- No setup required. Functions entirely online—no downloads or installation needed.
- Audio capture supported. Records both external voice and internal sound sources.
- Simple layout. Clean controls make it easy to operate, even for first-time users.
Cons:
- Online-only tool. Requires an active internet connection to function.
With Video Candy, anyone can produce clips effortlessly from a browser window. It’s a handy solution for quick tasks, tutorials, or walkthroughs without the overhead of traditional screen recording software.
FAQ about screen recorder for Windows
- How do I record voiceover along with the screen?
- You can capture your voice by selecting the microphone as an audio source in the screen recorder settings.
- How much disk space do screen recordings with audio typically occupy?
- The required disk space can vary depending on several factors. For a 1080p resolution video at 30 frames per second (fps) with average compression, expect around 200-300 MB per minute of recording. For a 4K resolution video at 60 fps with higher quality compression, the file can easily exceed 1 GB per minute.
- What formats will my screen recording with audio be saved in?
- Most screen recordings are saved in popular video formats such as MP4 or AVI depending on the settings chosen by the user.
- How do I enable system audio recording on my computer?
- Depending on the software you're using, you may need to adjust your system's settings. Or you will need to select the appropriate audio source within the screen recording application.
- How can I ensure good quality in my screen recording with audio?
- Use a high-quality microphone, minimize background noise, and adjust audio levels to avoid clipping or distortion.
- Is it legal to record online meetings or webinars with audio?
- It depends on the terms of service of the platform hosting the meeting. Plus, always make sure to obtain consent before recording any online meeting or webinar.
- Is it possible to mute or include specific applications’ audio while recording?
- Yes, some screen recording setups allow you to select programs whose sounds you want to include or exclude from the video. Check your audio settings to configure these preferences.
- What should I do if my microphone audio is too quiet or too loud in the video?
- Adjust the input levels or use post-processing audio editing tools to normalize or enhance the volume. Ensure that your microphone is positioned correctly to capture sound effectively.
Conclusion
In conclusion, knowing how to screen record on Windows is crucial for work or personal use. Whether you prioritize simplicity, advanced editing capabilities, or extensive customization, there's a screen recorder with audio out for you.
From the intuitive Icecream Screen Recorder and the user-friendly Game Bar to the versatile OBS Studio and the feature-rich ShareX, each option empowers users to capture, annotate, and share their screen experiences seamlessly.


