How to Record Lectures: Tips & Tricks
Lecture recording can enhance learning and understanding, improve note-taking and studying, and provide a reliable source of information for future reference.
In this article, we will describe using 6 best apps for recording lectures as well as provide tips on how to make your educational video guide engaging.
Why record lectures?
- Helpful for students who may have missed a class or need to clarify certain points.
- Assists with note-taking by offering a backup source for crucial information and promoting concentrated listening.
- Useful for individuals with learning disabilities or auditory processing issues, as they can pause and replay sections as needed.
- Serves as a valuable asset for studying and getting ready for exams, as it enables the preservation of essential material.
- Provides a record of attendance and involvement, which may be requested for select classes or programs.
- Can be used as a part of the teaching portfolio by the professor.
Overall, documenting lectures can provide benefits for individuals who need to revisit or refer to essential information. It allows you to capture the lecture in its entirety and listen to it as many times as necessary.
Icecream Screen Recorder
Icecream Screen Recorder is a user-friendly video recording and screenshot taking software. Utilizing this program, you can easily record your presentations, classes, and tutorials with just a few clicks. Additionally, it offers numerous advantages that make it the preferred approach for recording lectures.
How to record lectures with Icecream Screen Recorder
- Download screen recorder for PC, install and open the program.
- Configure the settings:
- Identify the recording area: full screen or draw the square manually.
- Choose the shape for the style of the camera - square, circle, etc.
- Adjust the audio settings.
- Set the output video resolution and quality.
- Whenever you're ready, hit "REC". While you're recording, you can open the drawing panel and annotate your video as you go with textual or graphical elements.
- To end the capturing, press "Stop".
- Preview the video and make edits, if necessary. For example, trim the beginning of your video to delete the audio testing part.
- Save the recorded lecture and share it with your students in a way that's convenient for you.
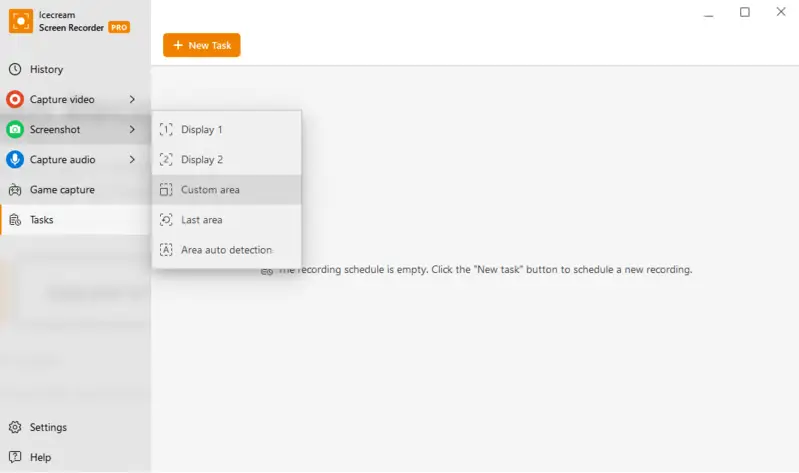
Pros:
- User-Friendly Design. The video recorder boasts an intuitive interface, making it easily navigable for individuals with different technical skill levels.
- Diverse Recording Choices. Users can opt for various screen recording options, including full-screen, window, or specific area capture, offering flexibility in capturing content.
- Scheduled Recording. Users are able to adjust all the settings and set up a timer for the recording to begin automatically.
- High-Quality. The free screen recorder produces excellent recordings with customizable options, empowering users to adapt their output to specific preferences.
- Incorporated Video Editing. The app is furnished with a built-in video editor, enhancing the convenience of making quick adjustments to recorded content without requiring additional software.
- Flexible Pricing Plans. The lecture recorder provides both free and affordable paid plans tailored for personal and commercial use, ensuring accessibility for a wide range of users.
In summary, utilizing Icecream Screen Recorder is the best way to record lectures. It not only saves time but also helps in better understanding and retention of information. So, why wait? Download the free screen recording software now and make the learning experience of your students more enjoyable.
Loom
Lecture recording through Loom offers a fantastic means of capturing and sharing screenshot with essential information with efficiency and effectiveness. This easy-to-use tool allows you to record your screen, audio, and webcam simultaneously, making it perfect for producing video lectures.
How to record lectures with the help of Loom
- Download the app or install the Chrome extension.
- Login into your account on the web and hit "Record a Loom". Select the screen capture area or window.
- Allow the app to access your camera and microphone. Adjust the input sources if the preferred ones are not selected.
- When ready, click "Start recording".
- To end screen capturing, press the red stop icon. You can also use the hotkey combination, for Mac it is Command + Shift + L; for Windows - Ctrl + Shift + L.
- The video will automatically be saved to your Loom account. You can then edit it and share the materials with your students or colleagues through a link.
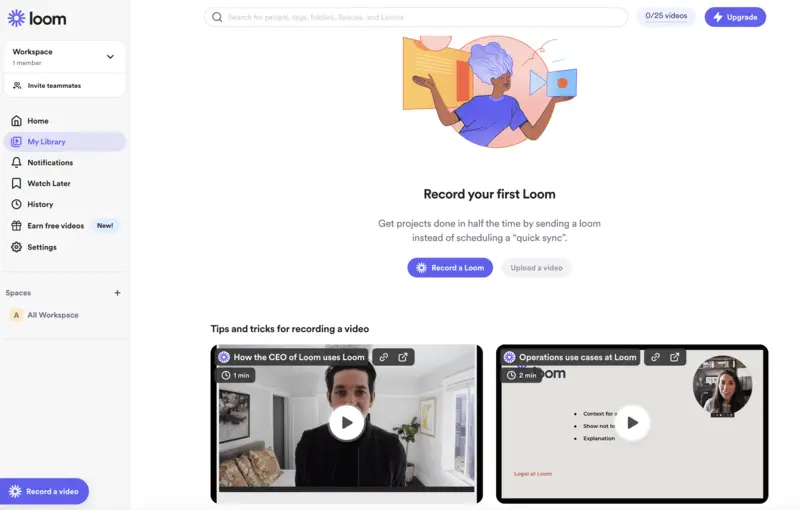
Pros:
- Lectures can be effortlessly distributed to a wide audience via a link.
- The screen recorder allows for visual aids and annotations to video while presenting.
- There are multiple options for editing and customizing videos.
- Provides feedback from viewers through comments and reactions.
- Automatically saves results, eliminating the risk of losing important information.
- Supports scheduled recordings, making it easier to capture lectures at set times without manual intervention.
Cons:
- The basic plan only allows webcam videos of up to 5 min and storing up to 25 clips.
- Some features, like downloading the video file, are only available in the paid plans.
- There may be compatibility issues with certain browsers or devices.
In general, many consider Loom to be the best way to record a lecture online. With its user-friendly interface and various features, it is a preferred method for recording lectures by many educators and professionals. If you're not restricted by the budget, why not give it a try?
Zoom
Zoom is a widely used platform for virtual meetings that has become an indispensable tool for online education and explainer video. One of its most useful features is the ability to record lectures, which allows students to review the material at their own pace and convenience.
How to record a lecture in Zoom
- Go to the website and create an account if you don't have one already. Download the app and complete the installation process.
- Open the program. On the left top toolbar panel, locate "Clips".
- There, find the "Create clip" button. In the new window, adjust the recording settings: choose the microphone input, the web camera, and the resolution. There are also advanced settings if needed. Click the camera icon to test the video.
- Whenever you're ready, press "Start Recording". While filming, hit the pause button to take a break when needed.
- As you conclude your video lecture, press "Finish" to save your recording.
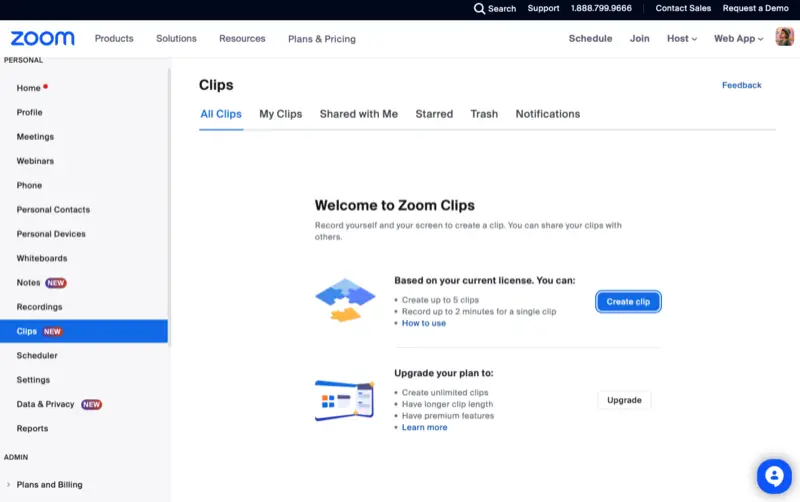
Pros:
- Captures webcam video, screen sharing, and audio.
- Ability to edit the recorded lessons within the app.
- Recordings can be shared easily via links or email attachments.
- Can also be used to record lectures in real-time.
- Integrates with calendars and LMS platforms, streamlining scheduling and sharing.
Cons:
- Restricted cloud memory with free accounts.
As a final point, the use of Zoom for recording lectures proves to be a convenient method for delivering course material. By following the simple steps outlined above, educators can easily create high-quality recorded lectures that benefit their students in various ways.
Panopto
Panopto is a specialized app for recording lectures designed to help educators create the most engaging video materials. This free screen recorder has an easy-to-use interface and effective capabilities to produce great video lectures even without any knowledge of film editing.
NOTE: This lecture recording software has to be purchased by an academic institution to be available for its teachers.
How use Panopto lecture recording app
- Visit the website and create a new account.
- Once logged in, click the "Create" button. Select the "Panopto Capture" option from the dropdown menu.
- Pick the microphone and camera source. Set a virtual background if you'd like.
- Begin capture with the red record button.
- In the new window, choose the read to be filmed: entire screen, application, or browser tab. Check "Share audio" and hit "Share".
- When you're done, press stop. Preview your video and pick the folder to save it to. If you're not satisfied with the result, you can hit "Redo" and film again.
- Enter the name and description. Use the "Edit" button to make changes to the video.
- The "Manage Access" button will provide configuration to who can view your video lectures.
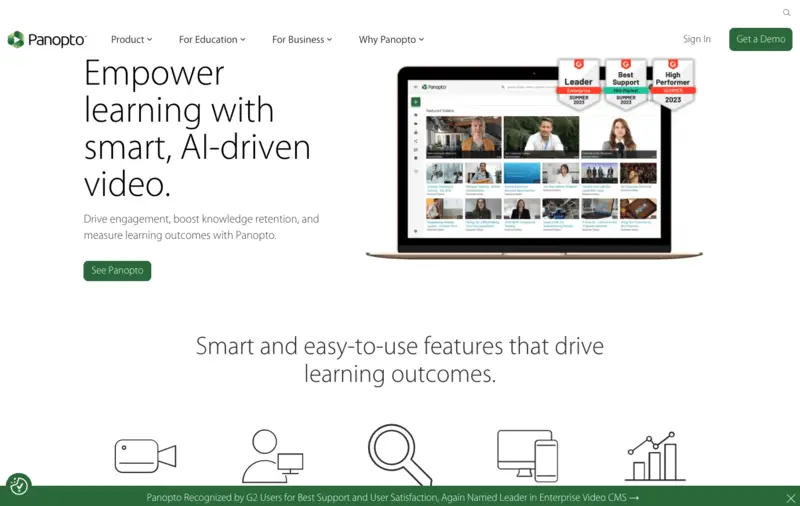
Pros:
- Specially designed app for recording lectures for educators.
- Easy to use video recorder with a simple interface.
- Accessible on any internet-connected device.
- Provides high-quality video and audio recordings.
Cons:
- Limited access to individuals, only enterprise plans.
- Users report occasional technical difficulties or glitches during recording.
In conclusion, Panopto Express is a great lecture recorder due to its convenience, accessibility, and user-friendly features. With minimal effort, you can effortlessly capture the materials and share them with your students so they can review them later.
Game Bar
Game Bar is a built-in video recording tool in Windows that can be incredibly useful for recording lectures, especially when you need a quick solution and don't have specialized software at hand. This app, originally designed for capturing gameplay, offers a simple and effective way to record your screen.
How to record lectures with Game Bar
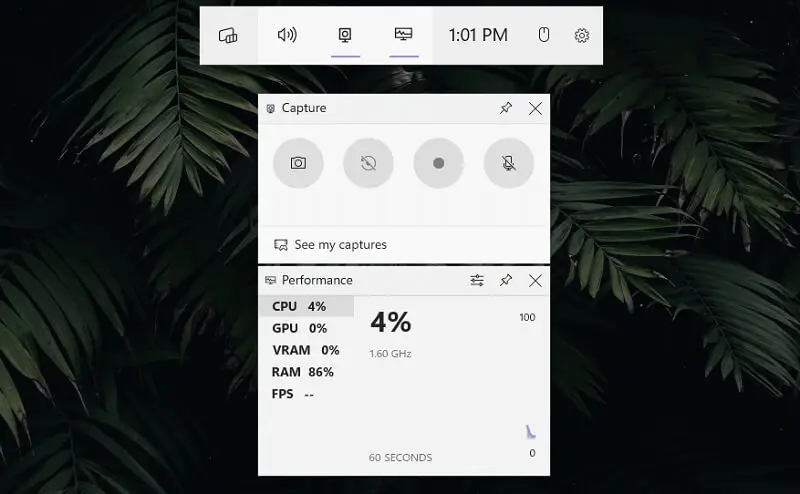
- Press Win + G on your keyboard to open the Game Bar. This shortcut works on Windows 10 and 11.
- Click on the settings icon (gear) in the menu and ensure that the "Record clips, screenshots, and broadcast using Game Bar" option is enabled.
- Hit "Record" or press Win + Alt + R to start capturing.
- To stop recording, click the corresponding button or press Win + Alt + R again.
You can find your recorded lecture in the "Captures" folder within your "Videos" library. The file will be saved in MP4 format.
Pros:
- It’s straightforward to activate and operate, with simple keyboard shortcuts for starting and stopping videos.
- There's no need to download or install additional software.
- Can capture both system audio and microphone input.
- Saves clips in MP4 format, which is widely supported and easy to share or edit.
Cons:
- It lacks features for annotating or highlighting during the recording.
Game Bar is an ideal option for those moments when you need to document important information on the fly without the need for additional applications.
iOS Screen Recorder
There is a built-in screen recording feature available on all modern iPhones and iPads. It's a handy tool for capturing lectures, tutorials, or online classes without needing any third-party programs.
How to record lectures on iOS
- Open the "Settings" app and go to "Control Center".
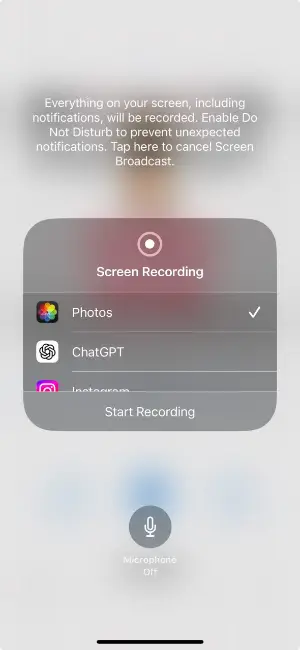
- Tap "Customize Controls" (or Control Center > Included Controls on iOS 14+), then add "Screen Recording" if it's not already there.
- Swipe down from the top-right corner (iPhone X or later) or swipe up from the bottom edge (iPhone 8 or earlier).
- Hit the circle inside another circle icon. After a 3-second countdown, the process will begin.
- To capture audio along with the screen, long-press the "Record" button and turn the "Microphone" toggle on before starting.
Your lecture will be saved automatically in the "Photos" app. The file is stored in MOV format.
Pros:
- Built into all recent versions of iOS, requiring no extra apps.
- Supports both screen and microphone audio.
- Easy to enable and use from Control Center.
Cons:
- No annotation or pointer tools during the process.
- Cannot pause and resume mid-session.
iOS screen recorder is a convenient, no-fuss option for capturing lectures directly on your device — perfect for students or professionals needing quick documentation of class content or presentations.
Tips on Lecture Recording
The importance of lecture recording has significantly increased with the emergence of online learning and virtual classes. Below are some tips that a professor can use to create great multimedia materials for their students.
Tip 1. Choose the Right Equipment
Having the proper equipment is crucial in the process of recording lectures successfully. While most smartphones have built-in voice recording capabilities, investing in a good-quality external microphone can greatly improve the audio quality of your recordings. Additionally, make sure your computer has a good web camera or invest in buying an external one.
Tip 2. Find a Suitable Location
The location you choose for screen recording your lectures can greatly impact the quality of your recordings. Avoid noisy areas or places with poor lighting that may interfere with audio and video clarity. A quiet, well-lit room is ideal for recording lectures.
Tip 3. Prepare and Outline
Before video recording, have a clear outline of the lecture content. This helps in maintaining a smooth flow and ensures that all key points are covered.
Tip 4. Use a Video Recording Software or App
There are several apps and screen recording software available specifically for recording lectures. Choose the lecture recorder that has the features you need the most: video trimming, editing, audio adjustment, stabilization, etc.
Tip 5. Test Your Equipment
Before you start, it's important to do a test run with your software and hardware. This will aid you in guaranteeing that all components are functioning properly and that you are well-versed in their usage. This will also allow you to make any necessary changes to enhance your recordings.
Tip 6. Be Close to the Microphone
While capturing lectures in a classroom setting or just from home, put the microphone close to yourself. This will help ensure that your recording captures the audio clearly and minimizes any background noise.
Tip 7. Notify Your Students
Always make sure to let your students know that the lecture will be recorded before you begin. Remember that recording someone without their permission may bring legal consequences.
Tip 8. Engage with the Camera
Even if you're recording a lecture with no one attending at the moment, treat the camera as if it were a student. Maintain eye contact, smile occasionally, and use gestures to make the lecture more engaging and personable.
Tip 9. Provide Visuals and Annotations
Use visual aids such as slides, diagrams, or illustrations to complement your verbal explanations. Consider using annotation tools to highlight key points on the screen.
Tip 10. Encourage Interaction
Incorporate questions, prompts, or discussions throughout the lecture to encourage student engagement. This can be done through polls, discussion forums, or follow-up assignments.
Tip 11. Offer Supplemental Resources
Provide additional resources like readings, articles, or links to further enhance the learning experience. This helps students who want to explore topics in more depth.
Tip 12. Enable Closed Captions
If possible, enable closed captions or provide transcripts to enhance accessibility for all students, including those with hearing impairments.
Tip 13. Edit Your Screen Recordings
Once you have finished video recording your lectures, it's important to edit and organize them for easy access. Label each recording with the date, class title, and topic covered. You can also add timestamps to mark important sections or topics within the lecture.
Recorded Lectures vs Webinars vs Online Course
When it comes to learning, there are various options available nowadays. With the advancement of technology, traditional methods of teaching such as lectures have been replaced with newer and more convenient options like webinars and online courses.
| Type of Materials | Description |
|---|---|
| Recorded Lecture. | Resembles a traditional form of teaching where a professor delivers a lecture in a classroom (real or virtual). It allows for direct interaction between the students and the professor, providing a more personal learning experience. |
| Webinar. | A virtual seminar allows students to attend from anywhere in the world. They provide real-time interaction with the instructor and other participants, making it a more engaging learning experience. However, webinars also have a fixed schedule and may not be available on demand. |
| Online Course. | A pre-recorded set of lectures can be accessed at any time and from anywhere. It offers flexibility, enabling students to learn at a self-directed speed. Online courses also provide access to a wide range of topics and expert instructors from around the world. However, they do not have the opportunity for immediate interaction with an instructor or peers. |
Overall, each video recording method has its benefits and drawbacks. Lectures provide a personal touch but require physical attendance, webinars offer real-time interaction but have fixed schedules, and online courses has flexibility but lack live activities.
In recent times, lecture recording has gained popularity as it incorporates the advantages of each of the three techniques. Presentations have the capability of being recorded and shared on the internet for students to conveniently access.
In conclusion, whether you prefer lectures, webinars, or online courses depends on your personal preferences and needs. However, thanks to the opportunity to screen capture lectures, there is a convenient and effective way to learn by combining the best aspects of all three methods.
FAQ on lectures recording
- Are there any downsides to recorded lectures?
- One potential drawback is the possibility of students developing a dependence on them and disregarding in-person attendance, resulting in decreased participation and engagement.
- Are recorded lectures as effective as in-person ones?
- While they may not provide the same level of interaction and engagement, studies have shown that well-produced recorded lectures can be just as impactful as traditional ones.
- How can I ensure the recorded lectures are engaging for students?
- To enhance engagement, maintain a conversational tone, use visual aids, include interactive elements, and encourage student participation through discussion forums or quizzes.
- Should I edit my recorded lectures, and if so, how much editing is necessary?
- Basic editing for clarity is recommended. Trim unnecessary sections, add captions for accessibility, and ensure the video quality is optimal. However, avoid over-editing to maintain authenticity.
- Can I use copyrighted material in my recorded lectures?
- Exercise caution with copyrighted material. Consider using content under fair use, obtaining permission, or exploring open educational resources. Familiarize yourself with copyright laws in your region.
- What file formats and settings are suitable for recording lectures?
- Choose widely supported formats like MP4 and ensure compatibility with the platforms you'll be using. Optimal settings depend on factors such as resolution, frame rate, and audio quality.
- How long should a recorded lecture be for optimal student engagement?
- Aim for a reasonable duration, usually between 15 to 20 minutes per segment. For posting online, consider breaking the long lecture into parts. Shorter videos help maintain student attention, and breaking content into smaller chunks aids comprehension.
- Where can I share my recorded lectures?
- You can use learning management systems (LMS) like Moodle or Blackboard for enrolled students, or on video hosting platforms like YouTube with privacy settings adjusted based on your preferences. Webinar platforms such as Zoom or Microsoft Teams are also suitable for sharing recorded lectures, especially if live sessions are involved.
Conclusion
In summary, when choosing the best app to record lectures, keep in mind what you want to achieve and whether the program offers such features.
By following the above advice and guidelines, you will create high-quality screen recording of lectures that will aid in students' understanding and retention of course material. So, give the described lecture recorders a try and enhance your teaching capabilities!


